What Are The Basic Car Maintenance Tips?


Car maintenance is essential to keep your vehicle running smoothly and avoid costly repairs. Regular maintenance not only extends the life of your car but also ensures your safety on the road.
Here are some basic car maintenance tips that everyone should know…
Regular maintenance involves checking and maintaining fluid levels. This includes engine oil, transmission fluid, brake fluid, and power steering fluids. Maintaining proper fluid levels helps to enhance the performance and longevity of your vehicle.
Changing oil and filters on a regular basis is also crucial. Clean oil and filters ensure the smooth operation of your engine and help improve fuel efficiency. It is recommended to follow the manufacturer’s guidelines for oil change intervals.
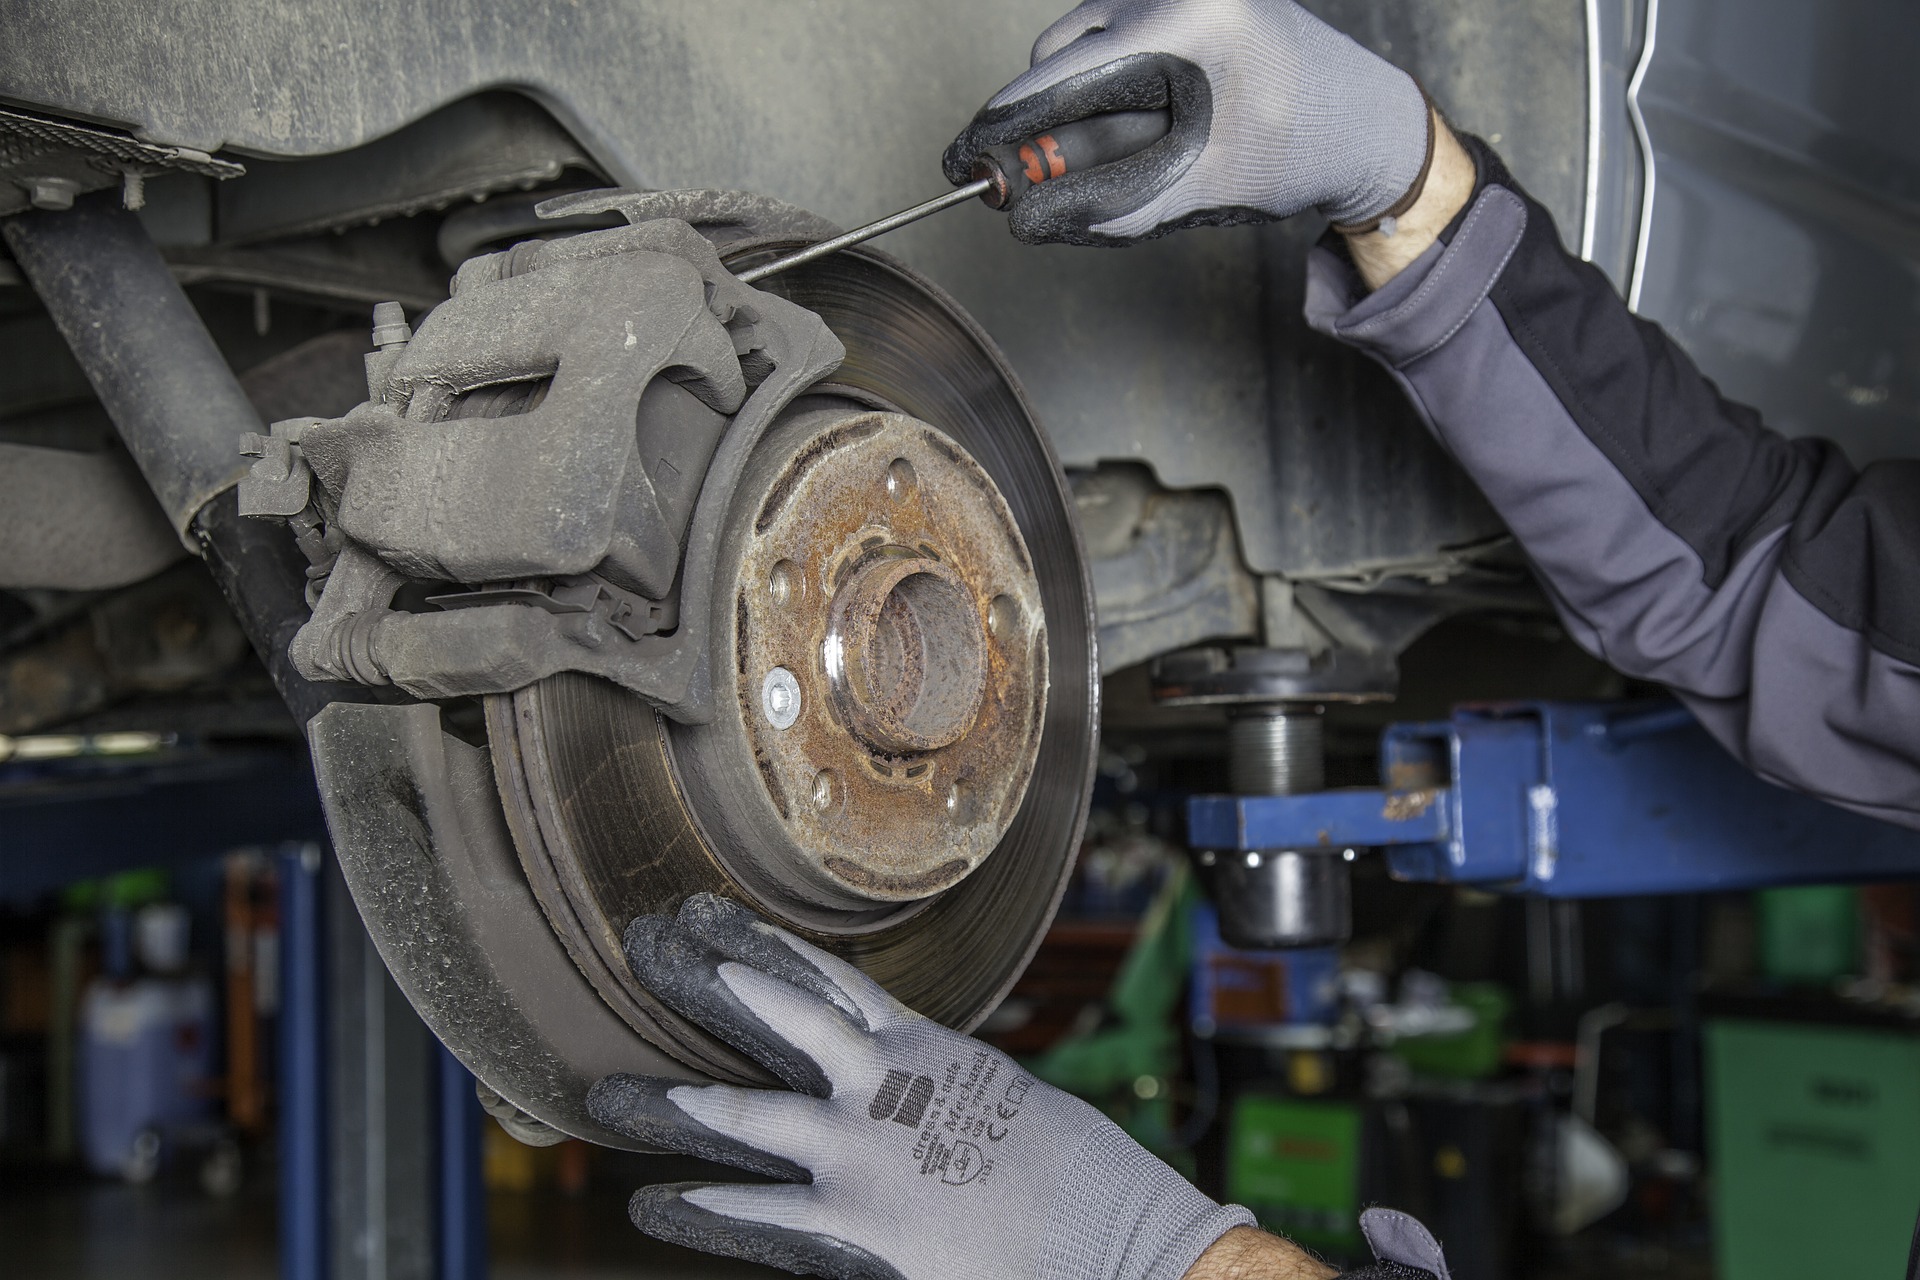
Inspecting your tires regularly is important for safety and optimal performance. Check tire pressure using a gauge to ensure accurate readings. Uneven wear may indicate the need for a tire rotation. Additionally, inspect for any damage or excessive wear that may require the attention of a tire dealer or repair shop.
Maintaining the battery is vital for reliable starting and electrical functions. Regularly inspect the battery terminals for corrosion and clean if necessary. Ensure the battery cables are securely attached to the terminals. If you notice a dead battery or issues with starting, it may be time for a battery replacement.
By following these basic car maintenance tips, you can prevent potential problems, improve fuel economy, and save yourself from costly repairs down the road. Regularly scheduled maintenance should be followed as per the manufacturer’s recommendations to keep your vehicle in optimal condition.
The Importance of Car Maintenance
Regular car maintenance is essential for keeping your vehicle in proper working order, preventing expensive repairs, and increasing its value. Following a preventative maintenance schedule not only ensures that your car runs smoothly but also helps you avoid voiding its warranty.
Performing basic maintenance tasks on a regular basis can save you from costly repairs down the road. Checking the fluid levels, such as transmission fluid, brake fluid, and engine oil, is crucial as low levels can lead to major engine damage. Replacing worn-out brake pads and timing belts prevents accidents and costly repairs. Additionally, regularly changing the engine air filter and oil filter improves fuel efficiency and extends the life of your engine.
Other maintenance tips include keeping an eye on tire pressure and rotating the tires to prevent uneven wear. Checking the condition of the windshield wipers and brake lights ensures optimum visibility and safe driving. Maintaining proper coolant levels and cleaning the battery terminals can prevent a dead battery. Regularly inspecting the drive belt (also known as a serpentine belt) for wear and tear or worn-down belts, as well as checking the cleanliness of the windshield and ensuring that the washer fluid is topped up, contributes to safer and more efficient driving.
By following a regular maintenance schedule and paying attention to these basic maintenance tasks, you can keep your car in the best possible condition. Not only will this help you avoid expensive repairs, but it will also increase the resale value of your vehicle. So, make sure to prioritize car maintenance and reap the benefits of a well-maintained vehicle.
How Often Should You Take Your Car in for an Inspection?
Regular car inspections are vital for maintaining the overall health and functionality of your vehicle. The frequency at which you should take your car in for inspection depends on a few factors.
First, it’s important to consider the manufacturer’s recommendations. They provide a suggested maintenance schedule in the owner’s manual. Following this schedule ensures that you are taking the necessary steps to keep your car running smoothly.
In addition to the manufacturer’s recommendations, state requirements may dictate how often you need to have your car inspected. Some states require annual inspections to verify that your vehicle meets safety and emissions standards.
One essential maintenance task that should be performed regularly is an oil change. The owner’s manual will specify how often this should be done. Typically, it’s recommended to change your oil every 3,000 to 5,000 miles, but this may vary depending on the type of engine oil you use and your driving habits.
Other maintenance tasks outlined in the owner’s manual, such as checking fluid levels, inspecting brake pads, and replacing air filters, should also be performed at the intervals specified.
By following the manufacturer’s recommendations and state requirements, as well as staying on top of regular maintenance tasks outlined in the owner’s manual, you can ensure that your car runs efficiently and avoid costly repairs in the long run.
Signs My Car Needs Maintenance Done
There are several signs that indicate that your car is in need of some maintenance. Paying attention to these signs can help prevent costly repairs and keep your vehicle running smoothly.
One of the most common signs that your car needs maintenance is a soft brake pedal or squeaking/scraping sounds during braking. If you notice that it takes more effort to stop your car or hear any unusual noises, it’s time to have your brake pads checked.
Changes in vehicle acceleration can also indicate that maintenance is needed. If you notice a decrease in power or a delay in acceleration, it could be a sign of a dirty fuel filter or a problem with the fuel injection system.
Vibration during starting, turning, or stopping can be a sign of worn out or unbalanced tires. It’s important to have your tires inspected and if necessary, rotated or replaced by a professional.
Stalling or difficulty starting the engine can be caused by a number of issues, including a faulty spark plug or a dirty air filter. Regularly checking and replacing these parts can help avoid such problems.
Changes in fuel efficiency can also indicate that maintenance is needed. If you notice a sudden decrease in fuel economy, it could be due to a clogged fuel filter, dirty fuel injectors, or even a malfunctioning oxygen sensor.
Lastly, if you experience hard shifts or lurching in automatic transmissions, it’s important to have the transmission fluid and filter checked and potentially replaced. This can help prolong the life of the transmission and prevent costly repairs down the line.
By paying attention to these signs and addressing any necessary maintenance on a regular basis, you can keep your car running smoothly and avoid unexpected breakdowns.
How To Check Tire Pressure
Regularly checking tire pressure is an important aspect of basic car maintenance. Maintaining proper tire pressure helps improve fuel efficiency, extends tire life, and ensures optimal vehicle alignment. Here are the steps for checking tire pressure:
1. Use the same tire pressure gauge: It is essential to use a reliable and accurate tire pressure gauge for consistent readings.
2. Check in the morning: Tire pressure should be checked in the morning before driving the vehicle. This is because tires heat up as you drive, which can lead to inaccurate readings.
3. Consult the carmaker’s recommended pressure: The recommended tire pressure can be found in the owner’s manual or on a sticker located on the driver’s side door jamb. It is important to follow this recommendation rather than the maximum pressure listed on the tire.
4. Remove the valve cap: Unscrew the valve cap on the tire to access the valve stem. Set the cap aside in a safe place.
5. Press the gauge onto the valve stem: Firmly press the tire pressure gauge onto the valve stem and hold it in place until the gauge reading stabilizes.
6. Read the pressure: The gauge will display the current tire pressure in PSI (pounds per square inch). Compare the reading to the recommended pressure provided by the carmaker.
7. Add or remove air as necessary: If the tire pressure is too low, use an air pump to add air until it reaches the recommended level. If the pressure is too high, release some air using the valve cap or gauge.
8. Replace the valve cap: Once you have completed checking and adjusting the tire pressure, securely screw the valve cap back onto the valve stem.
Note: When you check the air pressure in your tires, make sure you remember to check your spare tire too!
By regularly checking and maintaining proper tire pressure, you can improve fuel economy, prevent uneven wear on tires, and promote better vehicle performance. Make it a part of your routine car maintenance to ensure a safe and smooth driving experience.
How To Check Oil Level
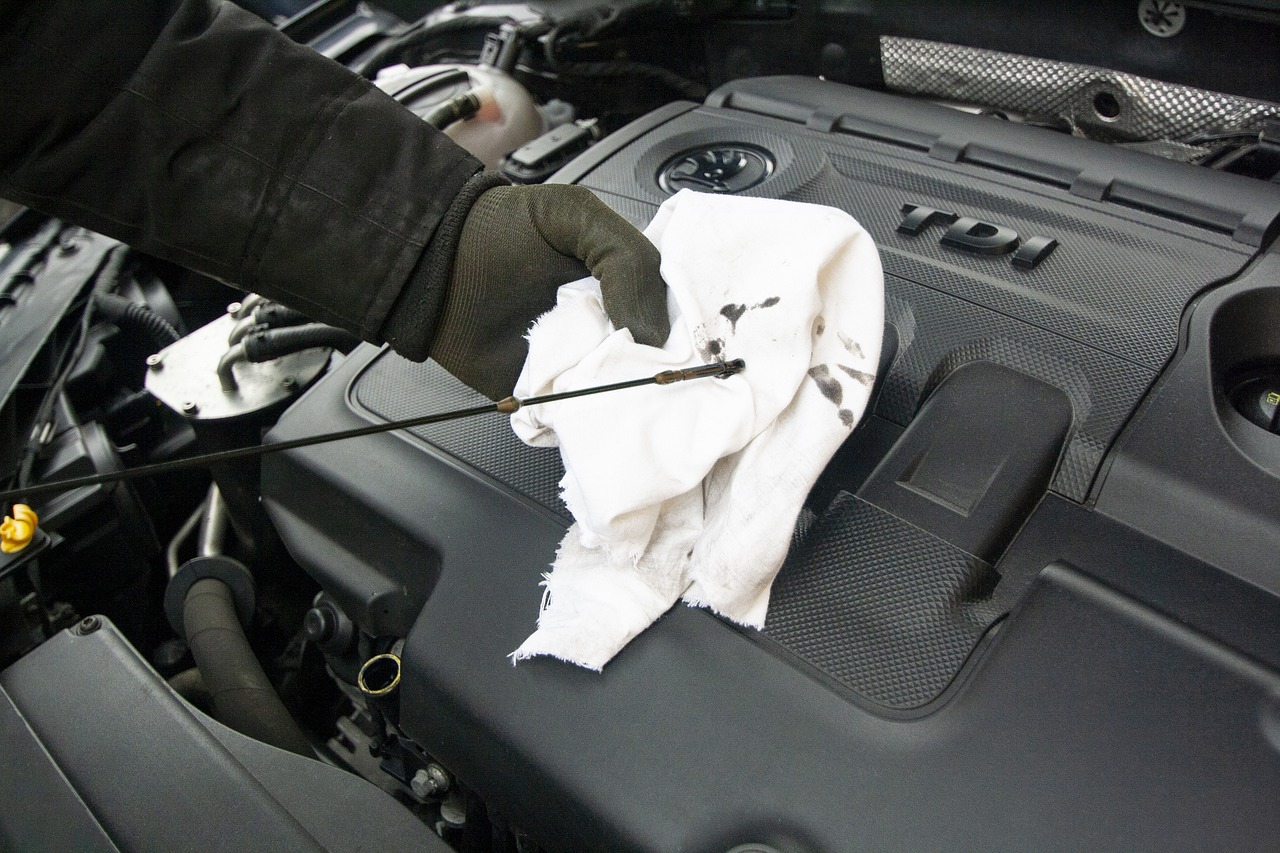
Checking the oil level in your car is one of the most basic and important maintenance tasks you can perform. Adequate oil levels are crucial for the smooth and efficient operation of your engine.
- To check your oil level, ensure that your car is parked on level ground and the engine has cooled down.
- Locate the oil dipstick, usually a brightly colored handle, and remove it from the engine.
- Wipe any oil off the dipstick with a clean cloth or paper towel, reinsert it into the engine, and then pull it out once more.
- The dipstick will have markings indicating the minimum and maximum oil levels. Check that the oil on the dipstick falls between these marks.
- If the oil level is below the minimum mark, you will need to add more oil.
- However, if the oil level is above the maximum mark, it is recommended to have the excess oil drained by a professional.
Regularly checking and maintaining the oil level in your car will help ensure the longevity of your engine and prevent costly repairs in the future.
OIL & FILTER
Regularly changing the oil and oil filter in your car is essential for maintaining its performance and prolonging its lifespan.
Engine oil plays a crucial role in keeping the moving parts of the engine lubricated, reducing friction, and preventing wear and tear. It also absorbs heat generated by the engine, preventing overheating. However, over time, the oil can become contaminated with dirt, debris, and other harmful particles. This is where the oil filter comes in, as it captures these contaminants and ensures that the oil remains clean and effective in its lubrication duties.
To change the oil and oil filter, follow these steps:
1. Locate the oil drain plug underneath the engine and place a container to catch the old oil.
2. Unscrew the drain plug and let the old oil drain completely.
3. Remove the old oil filter using an oil filter wrench.
4. Lubricate the rubber gasket on the new oil filter with fresh oil and screw it into place.
5. Refill the engine with the appropriate type and amount of new oil, as recommended by the manufacturer.
6. Use the dipstick to check the oil level and ensure it is within the acceptable range.
7. Start the engine and let it run for a few minutes to circulate the new oil.
8. Check for any leaks around the oil filter and drain plug.
Regularly changing the oil and oil filter is a simple yet important aspect of car maintenance. It helps prevent engine damage, improves fuel efficiency, and reduces the likelihood of costly repairs down the road. By performing this basic maintenance task on a regular basis, you can ensure that your car’s engine stays clean, lubricated, and running smoothly.
OIL AND COOLANT LEVELS
Regularly checking and maintaining the oil and coolant levels in your car is essential for optimal engine performance and to prevent costly repairs. Here are the basic steps to checking these vital fluids:
For the oil level, start by parking your car on level ground and ensuring the engine is cool. Locate the oil dipstick, usually found near the engine. Pull it out and wipe it clean with a cloth. Reinsert the dipstick and then pull it out again to get an accurate reading. The oil level should be between the minimum and maximum marks on the dipstick. If it is low, add the recommended type and quantity of oil specified by the vehicle manufacturer.
To check the coolant level, locate the coolant reservoir, typically located near the radiator. The reservoir is translucent, allowing you to see the fluid’s level without removing the cap. Ensure the engine is cool before opening the reservoir cap. The coolant level should be between the minimum and maximum marks on the reservoir. If it is low, add a mixture of coolant and distilled water as recommended by the manufacturer.
It’s worth noting that in addition to checking levels, regular maintenance also includes coolant fluid exchanges. Refer to the vehicle manufacturer’s guidelines for the recommended frequency, as it may vary depending on make and model.
By regularly checking and maintaining your oil and coolant levels, you can ensure your car’s engine operates smoothly and avoid potential issues down the road.
How To Change Headlights
Proper car maintenance is essential for the longevity and performance of your vehicle. Regular upkeep can prevent costly repairs down the road and ensure your car runs smoothly. One crucial aspect of maintenance is taking care of your headlights. In this article, we will discuss the importance of keeping your headlights in good condition and provide step-by-step instructions on how to change them.
Why is Changing Headlights Important?
Headlights play a vital role in ensuring your safety while driving at night or in low-light conditions. They improve visibility, allowing you to see the road ahead and surrounding obstacles. Over time, headlights can become dim or start to fade, reducing their effectiveness. Regularly changing your headlights is necessary to maintain optimal visibility and ensure safety on the road.
Step-by-Step Guide to Changing Headlights:
1. Park your car in a safe and well-lit area. Turn off the engine and headlights.
2. Locate the headlight assembly at the front of your vehicle.
3. Remove any covers or access panels to gain access to the headlight bulb.
4. Disconnect the electrical connector from the back of the headlight bulb.
5. Carefully remove the old bulb by twisting it counterclockwise or gently pulling it out, depending on the bulb type.
6. Insert the new bulb into the socket, making sure it is correctly aligned.
7. Reconnect the electrical connector and ensure it is securely attached.
8. Test the new bulb by turning on your headlights.
9. If the new bulb is functioning correctly, replace any covers or access panels that were removed.
10. Repeat the process for the other headlight if necessary.
By following these simple steps, you can ensure that your headlights are always in good working condition, providing maximum visibility and improving safety while driving at night or in low-light conditions. Remember to consult your vehicle’s owner manual for specific instructions, as the process may vary slightly depending on the make and model of your car.
Check your headlights, turn signals, brake and parking lights
Ensuring the optimal functionality of your car’s headlights, turn signals, brake lights, and parking lights is paramount for safe driving and is a fundamental aspect of basic car maintenance. Begin by parking your car in front of a flat surface, such as a wall or a garage door, in a slightly dark or shaded area. This will allow you to better observe the brightness and alignment of the headlights. Turn on the headlights and observe their reflection on the flat surface. Both lights should be bright and illuminate evenly, ensuring proper functionality and alignment for safe nighttime driving.
Next, to check the turn signals, activate them one at a time and walk around the vehicle to visually inspect each light. The blinking of the turn signals should be consistent and clearly visible from both the front and rear of the vehicle. Pay attention to the color of the lights, ensuring they are the standard amber and red, and replace any bulbs that are dim or not functioning properly.
Similarly, the parking lights, typically located at the front and back of your vehicle, should be inspected for their functionality. Turn them on and ensure they emit a steady, non-blinking light, which is usually white or amber at the front and red at the rear. These lights are crucial for making your vehicle visible to other drivers when parked in low-light conditions or during inclement weather.
Lastly, verifying the functionality of the brake lights is vital as they signal to drivers behind you that you are slowing down or coming to a stop. To check the brake lights, have a friend stand behind the car while you engage the brakes. Your friend should confirm that both brake lights illuminate brightly and consistently each time the brake pedal is pressed. If a light is dim or does not illuminate, it may be time to replace the bulb or inspect the electrical connection.
How To Replace Your Wiper Blades
Ensuring that your vehicle’s wiper blades are in top-notch condition is crucial for maintaining clear visibility during adverse weather conditions. The process of replacing wiper blades begins with identifying the need for replacement, which is often indicated by streaking or screeching sounds during operation. Streaking occurs when the wiper blades do not effectively clear the windshield, leaving behind lines or wet spots. Screeching, on the other hand, is a high-pitched sound that occurs when the blades drag across the windshield, indicating that the rubber has likely worn down or hardened.
When it comes to selecting new wiper blades, opting for name brand products can be a wise choice due to their reputation for performance and durability. Name brand wiper blades often undergo rigorous testing to ensure they perform effectively and last through numerous cycles of use, providing a clear view in various weather conditions.
Understanding the standardized lengths and sizes of wiper blades is vital for selecting the appropriate replacements for your vehicle. Wiper blades come in various sizes, typically ranging from 12 to 28 inches, and it’s imperative to refer to your vehicle’s manual or utilize an online selector tool to identify the correct size for your specific make and model. Some vehicles may require two different sizes for the driver and passenger sides, so be sure to verify the specifications before purchasing.
Moreover, it’s worth noting that in some instances, you may have the option of replacing just the rubber portion of the wiper blades, rather than the entire blade assembly. This can be a cost-effective solution if the metal parts of the wiper blade are still in good condition. However, this process can be slightly more intricate and requires carefully sliding the new rubber insert into the existing blade structure.
- Lift the Wiper Arm: Begin by gently lifting the wiper arm away from the windshield until it stands upright.
- Position the Blade: Pivot the old wiper blade to a perpendicular position relative to the wiper arm to expose the connecting mechanism.
- Remove the Old Blade: Locate a small tab or button on the underside of the wiper blade. Press it and slide the old blade off the arm, being cautious not to let the metal arm fall back onto the windshield.
- Attach the New Blade: Align the new wiper blade with the wiper arm. Ensure the connecting mechanisms match and slide the new blade onto the arm until you hear a click, indicating it is securely attached.
- Lower the Wiper Arm: Gently lower the wiper arm back down to the windshield.
- Repeat: Perform steps 1-5 for the other wiper blade.
- Test the Blades: Turn on the wipers and spray windshield washer fluid to ensure they operate smoothly and effectively clear the windshield without any streaking or screeching.
By following these steps, you ensure that the wiper blades are replaced correctly, contributing to safe driving during inclement weather by providing a clear and unobstructed view of the road ahead.
How To Check Tire Tread Depth
Navigating through the essential aspects of car maintenance, understanding how to check tire tread depth becomes pivotal, ensuring safe driving by maintaining optimal traction and preventing unwanted on-road incidents.
- Gather a Tread Depth Gauge or a U.S. Penny: These are common tools used to measure tread depth effectively.
- Ensure Tires are Cool: Wait for the tires to cool down if the vehicle has been driven recently to ensure accurate readings.
- Locate Tread Wear Indicators: Identify the built-in tread wear indicators (small raised sections) within the grooves of the tire.
- Insert Gauge or Penny:
- If using a tread depth gauge, insert it into a groove on the tire and read the measurement.
- If using a penny, insert it into a groove with Lincoln’s head pointing inward and upside down.
- Evaluate the Depth:
- Gauge: A reading of 4/32 inches or more is ideal. If it’s 2/32 inches or less, the tire should be replaced.
- Penny: If the top of Lincoln’s head is visible, the tread is approximately 2/32 inches or less, indicating that it’s time to replace the tire.
- Check Multiple Spots: Repeat the measurement at various points around and across the tire to ensure even tread wear.
- Inspect All Tires: Perform steps 3-6 for all tires on the vehicle.
- Record the Measurements: Keep a log of the tread depth measurements for future reference and to monitor wear over time.
By following these steps, you can effectively monitor the tread depth of your vehicle’s tires, ensuring they remain within safe and legal limits, thereby maintaining optimal traction and safety on the road.
Rotate Tires
Ensuring the longevity and consistent performance of your vehicle’s tires is integral to safe and efficient driving, and to achieve this, it’s imperative to rotate tires regularly. The act of rotating tires involves changing their positions on the vehicle, such as moving the front tires to the rear and vice versa, to ensure that tire wear is evenly distributed across all four tires. This practice not only helps to extend the service life of the tires but also promotes balanced handling and traction, safeguarding against uneven tread depth that can adversely affect the driveability and safety of the vehicle.
The first rotation of the tires is particularly crucial and should not be overlooked. Typically, this should be performed as per the guidelines provided in the vehicle owner’s manual or approximately every 6,000 to 7,500 miles. Adhering to this interval helps to mitigate the risks associated with uneven tire wear and maintains the integrity of the tire’s tread depth, ensuring a stable and secure driving experience.
Moreover, it’s worth noting that tire dealers can be a valuable resource when it comes to determining the correct tire rotation pattern for your specific vehicle type, as different vehicles may require different rotation patterns to ensure optimal tire wear. Some tire dealers and companies even offer complimentary tire rotation services for the life of the tires when they are purchased directly from them, providing an added layer of convenience and assurance in maintaining the longevity and performance of your tires.
By diligently ensuring to rotate tires, monitoring tread depth, and adhering to recommended rotation patterns, drivers can safeguard against premature tire wear, maintain optimal vehicle performance, and navigate the roads with the assurance of secure and balanced driving conditions.
How To Jump Start a Dead Battery
Understanding how to jump-start a dead battery stands out as an invaluable skill, providing a lifeline in situations where your vehicle refuses to start, especially in unforeseen or remote locations. This straightforward procedure can breathe life back into a depleted battery, enabling you to navigate to a safe location or a professional service center for further inspection and assistance. Below are the systematic steps to safely and effectively jump-start a dead battery:
- Prepare Both Vehicles:
- Position another vehicle with a working battery close to the one with the dead battery, ensuring they do not touch.
- Ensure both vehicles are turned off, with keys removed from ignitions.
- Gather and Prepare Jumper Cables:
- Locate a set of jumper cables and ensure they are untangled and ready for use.
- Identify Battery Terminals:
- Open the hoods of both vehicles and locate the batteries.
- Identify the positive (+) and negative (-) terminals on both batteries.
- Connect Jumper Cables:
- Attach one red clamp to the positive (+) terminal of the dead battery.
- Connect the other red clamp to the positive (+) terminal of the good battery.
- Attach one black clamp to the negative (-) terminal of the good battery.
- Connect the other black clamp to an unpainted metal surface on the car with the dead battery, away from the battery itself.
- Start the Working Vehicle:
- Start the vehicle with the good battery and let it run for a few minutes.
- Attempt to Start the Dead Vehicle:
- Try to start the vehicle with the dead battery. If it starts, allow it to run while connected to the jumper cables for an additional few minutes to charge the battery slightly.
- Disconnect Jumper Cables:
- Carefully remove the jumper cables in the reverse order they were connected: first black from the metal surface, then black from the good battery, followed by red from the good battery, and finally red from the previously dead battery.
- Keep the Jump-Started Vehicle Running:
- Allow the jump-started vehicle to run for at least 15-30 minutes to allow the alternator to charge the battery. Alternatively, drive the vehicle for the same duration.
- Seek Professional Assistance:
- If the vehicle does not start after following these steps, or if the battery repeatedly dies, seek professional assistance as there may be underlying issues that require attention.
By adhering to these steps, you can effectively jump-start a dead battery, ensuring you’re never left stranded due to a battery failure and maintaining the continuity of your journeys on the road.
Also see:
A Guide to Charging Your Car Battery: How Long Does It Take and What To Look Out For?
How long to leave battery disconnected to reset car computer
How long to leave a car running to charge a battery
BATTERY PERFORMANCE CHECK
Ensuring the reliability of your vehicle involves a comprehensive battery performance check, a pivotal aspect that safeguards against unexpected breakdowns and enhances the longevity of your car battery. Regularly checking and maintaining your car battery’s performance is paramount as it powers all the electrical components of the vehicle, including the ignition system and the starter. Moreover, the battery provides the much-needed energy to the electrical system when the alternator is not running. Thus, a well-functioning battery is synonymous with a reliable and efficiently operating vehicle.
Extreme temperatures, both hot and cold, can significantly impact the battery’s performance and lifespan. Cold weather can slow the chemical reactions within the battery, while hot weather can speed up the reactions and potentially cause the battery to overheat, both of which can result in decreased functionality and, ultimately, failure. Therefore, annual battery testing becomes crucial, especially in regions experiencing extreme weather conditions, to ensure that the battery performs optimally throughout various climates. Particularly if the battery exhibits signs of weakness, such as difficulty starting the vehicle, dimming headlights, or if it falls within the 3-5 year age range, immediate attention and testing are warranted to prevent potential issues.
Understanding the voltage levels of a car battery provides insight into its charge status and overall health. A fully charged battery should read around 12.6 volts or above when the vehicle is off. When the vehicle is running, this reading should increase to approximately 13.7 to 14.7 volts, indicating that the alternator is charging the battery. If the voltage is below 12.4 volts when the vehicle is off, it may be 75% drained and require recharging or possibly replacing. In instances where the battery is low, jump-starting followed by recharging might be viable options to restore its functionality, albeit temporarily.
Incorporating a routine to check your battery, understanding the voltage levels, and ensuring annual battery testing, especially when signs of weakness are evident or as the battery ages, will not only enhance the battery’s service life but also ensure a smooth, uninterrupted driving experience, safeguarding against unexpected disruptions due to battery failures.
Here are the detailed steps to perform a battery performance check:
- Safety First:
- Ensure the vehicle is off, and the keys are removed from the ignition.
- Wear protective gloves and safety glasses to shield against potential acid splashes.
- Visual Inspection:
- Check for any obvious signs of corrosion, damage, or leaks on the battery.
- Ensure that the battery terminals are clean and tightly secured.
- Check the Battery Voltage:
- Use a multimeter and set it to the DC voltage setting.
- Connect the red (positive) lead of the multimeter to the positive terminal of the battery.
- Connect the black (negative) lead of the multimeter to the negative terminal of the battery.
- Note the voltage reading: A fully charged battery should read approximately 12.6 volts or above.
- Check the Electrolyte Levels (for non-sealed batteries):
- Remove the cell caps on top of the battery.
- Ensure that the electrolyte levels are above the plates and equal across all cells, adding distilled water if necessary.
- Replace the cell caps securely.
- Load Testing:
- With a battery load tester, connect the positive lead to the battery’s positive terminal and the negative lead to the negative terminal.
- Follow the instructions on the load tester and observe the voltage under load. A healthy battery should maintain a reading of 9.6 volts or above while under load.
- If the battery cannot maintain the voltage under load, it may be weak and require further professional testing or replacement.
- Check the Charging System:
- Start the vehicle and, using the multimeter, check the voltage at the battery terminals.
- The voltage should read between 13.7 and 14.7 volts, indicating that the alternator is charging the battery.
- If the voltage is outside this range, further professional testing of the charging system may be required.
- Check for a Parasitic Draw (if the battery drains quickly):
- With the vehicle off, disconnect the negative battery cable.
- Set the multimeter to the DC amperage setting and connect it in series between the negative battery terminal and the disconnected negative battery cable.
- Observe the amperage draw. A typical vehicle should draw roughly 50 milliamps or less. A higher draw indicates a potential electrical issue that requires further investigation.
- Recheck and Clean:
- Ensure all connections are secure, and the battery is clean before closing the hood.
- Use a mixture of baking soda and water to clean any corrosion from the battery terminals and cable ends, then rinse with clean water and dry.
- Record the Results:
- Keep a log of the battery voltage and any observations for future reference and to monitor the battery’s health over time.
By following these steps, you can effectively perform a battery performance check, ensuring that the battery and charging system are operating optimally and maintaining the vehicle’s reliability on the road.
How To Check Engine Air Filter
The engine air filter plays a pivotal role in maintaining a cleaner engine and enhancing its functionality. The engine air filter is instrumental in preventing dust, dirt, and other contaminants from entering the engine, thereby safeguarding the internal components and ensuring efficient operation. Particularly, a clean air filter can notably improve acceleration and fuel economy by allowing a smooth flow of clean air into the engine. Thus, it’s imperative to check and, if necessary, replace the engine air filter regularly to uphold these benefits.
To check the engine air filter, it’s advisable to refer to the owner’s manual, which will provide specific guidelines and locations pertinent to your vehicle model. However, the general steps to check the engine air filter are as follows:
- Locate the Air Filter:
- Refer to the owner’s manual to locate the air filter, typically housed within a black plastic casing in the engine compartment.
- Open the Air Filter Casing:
- Unclip or unscrew the fasteners holding the casing together, as per the instructions in the owner’s manual.
- Remove the Air Filter:
- Gently take out the air filter, being cautious not to allow any debris to fall into the bottom of the housing.
- Inspect the Air Filter:
- Hold the filter up to a light source and observe the amount of light passing through.
- Check for visible debris, dirt, or excessive dust that may be clogging the filter.
- Determine if Replacement is Needed:
- If the filter appears dirty, dusty, or clogged, it’s advisable to replace it to ensure optimal engine performance.
- Install the New Filter (if replacing):
- Ensure the new filter is compatible with your vehicle model.
- Place the new filter into the housing, ensuring it sits flush and securely.
- Secure the Air Filter Casing:
- Reattach the casing, ensuring all clips or screws are securely fastened.
- Document the Check/Change:
- Keep a record of the check and/or filter change to monitor future maintenance needs.
By adhering to these steps and ensuring that the engine air filter is routinely checked and replaced when necessary, you contribute to maintaining a cleaner engine, improving acceleration, and optimizing fuel economy, thereby ensuring that the vehicle operates at its peak efficiency and performance.
How To Refill Windshield Washer Fluid
Ensuring clear visibility while driving is paramount for safety, and having the ability to effectively clean a dirty windshield on the go is facilitated by adequately maintaining and knowing how to refill windshield washer fluid.
This seemingly simple task is crucial in removing dirt, bugs, and other debris from your windshield, providing an unobstructed view of the road.
Here’s a straightforward guide to refilling your windshield washer fluid, ensuring you’re never caught driving blind:
- Locate the Washer Fluid Reservoir:
- Open the vehicle’s hood and locate the windshield washer fluid reservoir. Typically, it’s a translucent container with a cap that’s labeled or has a windshield/water symbol.
- Check the Reservoir for Damage:
- Inspect the tank for any signs of cracks or damage that might lead to leaks.
- Address a Cracked Tank if Needed:
- If the reservoir is cracked, a temporary fix can involve placing a plastic freezer bag inside the tank and filling it with the washer fluid to prevent leaks until a permanent solution can be implemented.
- Open the Reservoir Cap:
- Remove the cap from the washer fluid reservoir.
- Use the Correct Fluid:
- It’s imperative to use windshield washer fluid instead of water due to its cleaning additives and its ability to withstand freezing temperatures, whereas water does not.
- Pour the Washer Fluid:
- Carefully pour the windshield washer fluid into the reservoir, ensuring not to overfill it.
- Replace the Cap:
- Securely place the cap back onto the reservoir, ensuring it’s tightly sealed.
- Test the Windshield Washers:
- Activate the windshield washers from inside the vehicle to ensure the fluid sprays adequately onto the windshield.
- Store Extra Fluid:
- Keep additional windshield washer fluid in your vehicle’s trunk for future top-ups, ensuring you’re always prepared.
By adhering to these steps to refill windshield washer fluid, you ensure that you always have the means to maintain a clear and clean windshield, thereby enhancing your visibility and safety while driving. Moreover, understanding the importance of using washer fluid vs water and knowing a temporary fix for a cracked tank can save you from potential visibility issues and keep you safe on your journeys.
How To Clean Your Car
Maintaining a pristine appearance and ensuring the longevity of your vehicle’s exterior involves a commitment to regularly clean your car, which goes beyond mere aesthetics. Engaging in a routine wash and incorporating wax treatments not only helps to preserve the paint job but also acts as a barrier to prevent corrosion, safeguarding your vehicle against the elements and potential contaminants.
Here’s a comprehensive guide to cleaning your car, ensuring it remains in optimal condition:
- Prepare the Essentials:
- Gather car wash soap, a bucket, sponges or soft cloths, a hose or source of water, and car wax. If you have been driving, let the engine cool before starting.
- Remove Loose Debris:
- Begin by removing any loose debris from the vehicle’s exterior, such as leaves or twigs.
- Wash the Exterior:
- Wet the car thoroughly and then apply car wash soap using a sponge or soft cloth, working from top to bottom and ensuring all areas are covered (try to avoid getting too much water on the brake rotors).
- Rinse thoroughly to remove all soap, paying attention to crevices and hidden areas where soap may accumulate.
- Dry the Vehicle:
- Use a clean, dry cloth or a chamois to dry the vehicle thoroughly, preventing water spots from forming.
- Apply Wax:
- Apply a quality car wax as per the product’s instructions, typically involving applying it in a circular motion and allowing it to haze.
- Buff the wax using a soft cloth until the vehicle shines.
- Clean the Windows:
- Use a window cleaner and a clean cloth to ensure all windows are clear and streak-free.
- Detail the Interior:
- Vacuum the interior, wipe down surfaces, and clean floor mats to maintain a clean environment inside the vehicle.
- Check and Clean Tires:
- Ensure tires are free from debris and apply a tire shine product if desired. Avoid using anything harsh like a wire brush, instead look for a spray-on treatment that breaks down brake dust.
- Inspect and Polish Chrome:
- Check any chrome parts and use a chrome polish to enhance their shine and prevent tarnishing.
Factors that determine how often you should engage in this process to clean your car include parking conditions (whether the vehicle is parked outdoors or in a garage), frequency of driving, and prevailing weather conditions.
For instance, vehicles parked under trees or exposed to bird droppings and sap may require more frequent washing. Similarly, if you drive your vehicle regularly or live in an area with harsh weather conditions, such as heavy snow or intense sun, maintaining a routine wash schedule becomes pivotal. As a general rule of thumb, aim to wash your car every 1-2 weeks.
Emphasizing the importance of washing and waxing as a means to protect the exterior, preserve the paint job, and prevent corrosion ensures that your vehicle not only retains a gleaming appearance but also sustains its integrity against potential external damages. This practice, when incorporated regularly, safeguards your vehicle against the myriad of contaminants it encounters, ensuring it remains in impeccable condition throughout its lifespan.
How to inspect your belts and hoses
Knowing how to inspect belts and hoses within the engine bay is paramount to ensuring the smooth operation and longevity of your vehicle. These components, though often overlooked, play a crucial role in maintaining the functionality of various systems within the vehicle, such as the cooling, power steering, and electrical systems. Here’s a detailed guide to inspecting the belts and hoses in your vehicle:
- Ensure Safety:
- Make sure the vehicle is turned off, the keys are removed, and the engine is cool to prevent any injuries during the inspection.
- Locate Belts and Hoses:
- Open the hood and locate the belts and hoses. Refer to the owner’s manual if necessary to identify them.
- Inspecting the Hoses:
- Check for cracks, which may appear as small lines or splits on the hose surface.
- Look for separations, which are gaps or spaces in the hose that may indicate internal damage.
- Examine for bulges, which are swollen areas on the hose that may indicate a weakened section.
- Feel the hoses to ensure they are firm yet pliable, not hard or excessively soft and squishy.
- If any of these issues are identified, consider replacing the hose to prevent future issues.
- Inspecting the Belts:
- Check for cracks, which may appear as small fissures or breaks on the belt surface.
- Look for signs of wear such as glazing, which appears as a shiny surface indicating the belt has become hard and is likely to slip.
- Examine the belts for fraying, which are loose strands or threads along the edges.
- Check the tension of the belts; they should be tight and not have excessive play.
- If you observe any of these signs of wear, replacing the belt is advisable to prevent breakage during operation.
- Check Connections and Fittings:
- Ensure that the hoses and belts are securely connected and fitted to their respective components and pulleys.
- Look for Leaks:
- Inspect the area around hoses for any signs of leaks or wet spots that might indicate a slow leak.
- Document Your Inspection:
- Keep a record of your inspections, noting any replacements or issues, to maintain a history of your vehicle’s maintenance.
By adhering to these steps to inspect belts and hoses, you ensure that these vital components remain in optimal condition, thereby safeguarding against potential breakdowns and maintaining the functionality of associated systems. Regular inspections and addressing issues promptly, such as replacing hoses and belts showing signs of wear, cracks, separations, or bulges, contribute to the overall health and longevity of your vehicle, ensuring a reliable and smooth driving experience.
How to check Spark Plugs
Understanding how to check spark plugs is pivotal, given their crucial role in ensuring the smooth operation of your vehicle. Spark plugs, though small, have a significant impact on the engine, influencing its performance and the overall driving experience.
Dirty or faulty spark plugs can manifest in various issues, such as starting issues, a noticeable dip in mileage, increased noise and vibrations during operation, and uneven acceleration, thereby emphasizing the importance of regular checks and maintenance.
Here’s a detailed guide on how to check spark plugs:
- Ensure Safety and Accessibility:
- Make sure the vehicle is off, the engine is cool, and the keys are removed.
- Open the hood and ensure you have clear access to the spark plugs.
- Locate the Spark Plugs:
- Identify the spark plug wires, which are typically thick, insulated wires running to the engine.
- The number of wires/plugs corresponds to the number of engine cylinders.
- Remove the First Spark Plug Wire:
- Gently twist and pull the boot (end of the wire) to remove it from the spark plug, being cautious not to pull on the wire directly.
- Inspect the Spark Plug Wire:
- Check for any signs of wear, burns, or damage to the wire and boot.
- Replace the wire if any damage is observed.
- Remove the Spark Plug:
- Using a spark plug socket and a ratchet, gently remove the spark plug by turning it counterclockwise.
- Inspect the Spark Plug:
- Check for any deposits, wear, or damage on the plug.
- Observe the electrode (the small rod in the plug’s center) for wear or damage.
- Check the Gap:
- Using a gap tool, ensure the gap between the electrode and the ground electrode (curved metal piece above the electrode) is within the specifications found in the owner’s manual.
- Reinstall or Replace the Spark Plug:
- If the spark plug is in good condition, gently screw it back into place using the socket and ratchet.
- If the spark plug shows signs of wear or damage, replace it with a new one, ensuring it is of the same type and specification.
- Reattach the Spark Plug Wire:
- Firmly push the boot onto the spark plug until it clicks or sits securely.
- Repeat for All Spark Plugs:
- Follow steps 3-9 for each spark plug in the engine.
- Document the Check:
- Keep a record of the check, noting any replacements or issues, to maintain a history of your vehicle’s maintenance.
By diligently following these steps to check spark plugs, you ensure that this vital component of the ignition system is in optimal condition, thereby safeguarding against potential issues such as starting problems, reduced fuel efficiency, and uneven acceleration. Regular checks and timely replacements of faulty spark plugs contribute to maintaining the engine’s health and ensuring a smooth, efficient, and reliable driving experience.
Vehicle Maintenance Checklist
Having a comprehensive “Vehicle Maintenance Checklist” is as an indispensable tool, guiding owners through the essential checks and routines that ensure the vehicle remains in peak condition, thereby safeguarding its performance, longevity, and your safety on the road…
Service Immediately
Understanding the critical actions to take when confronted with certain warning lights in your car is crucial to safeguarding both the vehicle’s health and your safety.
The illumination of the check engine light, for instance, is a clear signal that should not be ignored or delayed in addressing. It’s paramount to promptly visit a repair shop when this light appears, ensuring that any potential issues are identified and rectified by professionals.
Resisting the urge to reset this light without understanding the underlying cause is vital, as it could mask a potentially serious issue and lead to more significant problems down the line.
Encountering a situation where a headlight or taillight goes out demands immediate attention and action. The steps to address this issue generally involve:
- Checking for Blown Fuses:
- Refer to the vehicle’s manual to locate the fuse box and identify the correct fuse.
- Replace it if it’s blown, ensuring to use a fuse of the same amperage.
- Inspecting and Replacing the Light:
- Remove the light cover and inspect the bulb.
- If the filament appears broken or the bulb is darkened, replace it with a new one of the same type.
- Testing the Light:
- Ensure the new bulb or fuse resolves the issue by testing the light.
- Seeking Professional Help:
- If the issue persists, consult a professional to inspect the electrical system.
Moreover, the tire pressure light is another warning signal that warrants immediate action. The significance of inflating tires to the proper levels cannot be overstated, as it directly impacts the vehicle’s handling, tire longevity, and fuel efficiency. When the tire pressure light illuminates, it’s crucial to:
- Check the pressure in all tires using a tire pressure gauge.
- Inflate them to the recommended levels as per the vehicle’s manual or the sticker located inside the driver’s door.
- If the light persists, inspect the tires for punctures or seek professional assistance to ensure there are no issues with the tire pressure monitoring system (TPMS).
In essence, recognizing the urgency and significance of addressing warning lights such as the check engine light, headlight and taillight indicators, and the tire pressure light, and taking immediate, appropriate actions, ensures the vehicle remains in optimal condition, thereby safeguarding your journeys and prolonging the lifespan of the vehicle.
Monthly Check-up
Conducting a monthly check-up for your car is a pivotal practice, ensuring its optimal performance, safety, and longevity. Engaging in a routine monthly check-up allows you to identify and address potential issues before they escalate into more significant, often costlier problems, and ensures that your vehicle operates smoothly and reliably. This practice not only safeguards your vehicle’s functionality but also contributes to safer driving experiences, as potential hazards can be mitigated before they pose a risk on the road.
A thorough monthly check-up encompasses several key maintenance tasks that collectively contribute to the vehicle’s optimal performance and safety. Initiating with a visual inspection of the lights, ensuring that headlights, taillights, brake lights, and turn signals are all functioning correctly, is crucial for safe driving during various times of the day and in different weather conditions. This not only ensures your own visibility but also ensures other drivers can see you and predict your movements on the road.
Monitoring the motor oil and coolant levels is another integral aspect of the monthly check-up, ensuring that the engine is adequately lubricated and cooled, thereby preventing overheating and friction-related wear. Maintaining optimal levels of these fluids safeguards the engine’s functionality and prevents potential damage and breakdowns.
Tire maintenance, including monitoring tire pressure and inspecting the tread depth, is also paramount. Ensuring tires are inflated to the recommended pressure levels enhances fuel efficiency and handling, while checking the tread depth ensures that the tires provide adequate grip, particularly in wet conditions, thereby enhancing safety.
Ensuring an adequate supply of windshield wiper fluid is also vital, providing you with the means to maintain clear visibility by effectively removing dirt, bugs, and other debris from the windshield. This, in conjunction with ensuring the windshield wipers are in good condition, ensures you maintain optimal visibility, regardless of the conditions you encounter on your journeys.
In essence, a monthly check-up, encompassing the meticulous inspection and maintenance of lights, monitoring oil and coolant levels, ensuring optimal tire pressure and tread depth, and maintaining an adequate supply of wiper fluid, acts as a comprehensive approach to vehicle maintenance. This practice not only ensures the vehicle’s optimal performance and longevity but also enhances safety and reliability on the road, providing you with peace of mind throughout your journeys.
3-Month Check-up
A 3-month check-up serves as a cornerstone in ensuring your car remains in optimal condition, safeguarding its performance, aesthetic, and longevity. Engaging in a thorough check-up every three months allows you to address various aspects of vehicle maintenance that may not require monthly attention but are pivotal in ensuring the vehicle’s optimal functionality and appearance over the longer term.
One of the pivotal tasks involved in a 3-month check-up is to rotate the tires, a practice that is paramount in ensuring they wear evenly, thereby extending their life and maintaining optimal performance and safety. Rotating the tires prevents uneven wear, which can lead to noise and vibration problems, ensuring that the tires maintain optimal traction and handling characteristics. This practice not only enhances the safety and performance of the vehicle but also ensures that you get the maximum life out of your tires, providing a cost-effective approach to tire maintenance.
Waxing the vehicle’s finish is another task that should be incorporated into the 3-month check-up, providing a protective layer that safeguards against rust and maintains the aesthetic appeal of the vehicle.
Additionally, the 3-month check-up should also involve inspecting and repairing the exhaust system, particularly if you notice any unusual noises, such as a rattling muffler. The exhaust system is pivotal in directing gases away from the vehicle, and any damage or issues can lead to potential safety hazards and reduced performance. Ensuring that the exhaust system, including the muffler, is in optimal condition, ensures that the vehicle operates quietly and efficiently, and adheres to emissions standards.
In essence, a 3-month check-up, encompassing the rotation of tires to extend their life and prevent noise and vibration problems, waxing the vehicle to protect the finish from rust, and inspecting and repairing the exhaust system, provides a comprehensive approach to maintaining the vehicle’s performance, safety, and aesthetic. This routine, when adhered to diligently, ensures that the vehicle remains in peak condition, safeguarding your investment and ensuring reliable performance on the road.
6-Month Check-up
A 6-month check-up serves as a pivotal milestone in ensuring your car remains in optimal condition, safeguarding its performance, aesthetic, and longevity. This periodic check-up allows you to address various aspects of vehicle maintenance that are crucial in ensuring the vehicle’s optimal functionality and appearance over a more extended period.
Initiating the 6-month check-up, rotating the tires is a fundamental step that should not be overlooked. This practice ensures balanced tread wear, thereby extending the lifespan of the tires and maintaining optimal performance and safety. By rotating the tires, you prevent uneven wear, which can lead to noise and vibration problems, ensuring that the tires maintain optimal traction and handling characteristics. This not only enhances the safety and performance of the vehicle but also ensures that you get the maximum life out of your tires, providing a cost-effective approach to tire maintenance.
Moreover, to preserve the aesthetic appeal and protect the structural integrity of the vehicle, it is advisable to wax the vehicle at least twice a year. Waxing provides a protective layer that safeguards against rust and maintains the aesthetic appeal of the vehicle. This practice not only ensures the vehicle maintains its visual appeal but also protects the underlying metal from potential corrosion, ensuring the vehicle remains in optimal condition both visually and structurally.
Inspecting and repairing the exhaust system is another pivotal task in the 6-month check-up. Ensuring that the exhaust system, including the muffler, is in optimal condition, ensures that the vehicle operates quietly and efficiently, and adheres to emissions standards. Any damage or issues can lead to potential safety hazards and reduced performance, thereby emphasizing the importance of this task.
Testing the battery’s performance is another crucial aspect, particularly once it reaches three years of age. A battery performance check twice a year ensures that the battery is operating optimally, thereby preventing potential starting issues and ensuring the reliable operation of the vehicle. This practice ensures that any potential issues are identified and addressed promptly, ensuring the vehicle remains reliable and operational.
Lastly, consulting your owner’s manual to determine if the chassis, steering, and suspension systems require periodic lubrication is crucial in ensuring these systems operate smoothly and reliably. Ensuring these systems are adequately lubricated prevents wear and ensures they operate smoothly, thereby maintaining optimal handling and ride quality.
In essence, a 6-month check-up, encompassing the rotation of tires, waxing the vehicle, inspecting and repairing the exhaust system, performing a battery performance check, and potentially lubricating the chassis, steering, and suspension systems, provides a comprehensive approach to maintaining the vehicle’s performance, safety, and aesthetic. This routine, when adhered to diligently, ensures that the vehicle remains in peak condition, safeguarding your investment and ensuring reliable performance on the road.
1-Year Check-up
A 1-Year Check-up is paramount in ensuring your car sustains its optimal performance, safety, and longevity. This comprehensive check-up allows you to address various pivotal aspects of vehicle maintenance, ensuring the vehicle’s optimal functionality and safeguarding against potential issues that may arise in the future.
A critical component that warrants attention during the 1-Year Check-up is the inspection of air filters and cabin air filter. Air filters play a crucial role in ensuring that clean air enters the engine, thereby maintaining optimal combustion and preventing contaminants from entering the engine. Typically, air filters should be inspected at least once a year and replaced as necessary, depending on the driving conditions and any visible signs of wear or contamination.
Brakes are another pivotal component that should be inspected during the 1-Year Check-up. Ensuring the brakes are in optimal condition is paramount in safeguarding against potential safety issues. The inspection should encompass the brake pads, discs, and any associated components, ensuring they are in good condition and replacing any that show signs of wear. Typically, brake pads should be replaced every 50,000 miles, though this can vary depending on driving habits and conditions.
The inspection of shocks and struts is also crucial in the 1-Year Check-up, ensuring the vehicle maintains optimal handling and ride quality. Shocks and struts play a pivotal role in absorbing bumps and ensuring the tires maintain contact with the road. They should be inspected annually for signs of wear or damage and typically replaced every 50,000 to 100,000 miles, depending on driving conditions and the vehicle’s performance.
Coolant/antifreeze is another component that should be inspected during the 1-Year Check-up. Ensuring the coolant/antifreeze is at the optimal level and in good condition is crucial in preventing the engine from overheating and protecting against freezing. The coolant should be flushed and replaced as per the intervals recommended in the vehicle’s owner’s manual, typically every 30,000 miles or 5 years, depending on the coolant type and driving conditions.
In essence, a 1-Year Check-up, encompassing the inspection of air filters, brakes, shocks and struts, and coolant/antifreeze, provides a comprehensive approach to maintaining the vehicle’s performance, safety, and longevity. Adhering to recommended replacement intervals and ensuring these components are in optimal condition safeguards against potential issues, ensuring the vehicle remains in peak condition and providing peace of mind in your vehicular journeys.
2-Year Check-up
A 2-Year Check-up ensures your car remains in optimal condition, safeguarding its performance, aesthetic, and longevity. This periodic check-up allows you to address various aspects of vehicle maintenance that are crucial in ensuring the vehicle’s optimal functionality and appearance over a more extended period.
One of the pivotal tasks involved in a 2-year check-up is checking the spark plugs. These small, yet crucial components are vital for igniting the fuel-air mixture in the engine, ensuring optimal performance and fuel efficiency. Typically, spark plugs should be checked and potentially replaced every 30,000 miles or as per the manufacturer guidelines, ensuring they are in good condition and providing optimal ignition for the engine.
Inspecting and potentially adding transmission fluid is another crucial task in the 2-year check-up. The transmission fluid plays a pivotal role in ensuring the transmission operates smoothly, providing lubrication and facilitating gear shifts. The fluid should be at the optimal level and in good condition, ensuring the transmission operates smoothly and preventing potential damage. Typically, the transmission fluid should be replaced every 30,000 to 60,000 miles, depending on the vehicle and driving conditions, though it is crucial to refer to the manufacturer guidelines for specific intervals.
Replacing the fuel filter is another task that should be performed during the 2-year check-up. The fuel filter plays a crucial role in preventing contaminants from entering the engine, ensuring optimal combustion and preventing potential damage. Typically, the fuel filter should be replaced every 20,000 to 40,000 miles, depending on the vehicle and driving conditions, though it is crucial to refer to the manufacturer guidelines for specific intervals.
In essence, a 2-year check-up, encompassing the checking of spark plugs, inspecting and adding transmission fluid, and replacing the fuel filter, provides a comprehensive approach to maintaining the vehicle’s performance, safety, and aesthetic. Adhering to manufacturer guidelines for these maintenance tasks ensures that the vehicle remains in peak condition, safeguarding your investment and ensuring reliable performance on the road. This routine, when adhered to diligently, ensures that the vehicle remains in peak condition, safeguarding your investment and ensuring reliable performance on the road.
Long-Term Check-up
A Long-Term Check-up is pivotal, ensuring that your car sustains its optimal performance, safety, and longevity over an extended period. This comprehensive check-up allows you to address various pivotal aspects of vehicle maintenance, ensuring the vehicle’s optimal functionality and safeguarding against potential issues that may arise in the future.
A key component that warrants attention during a Long-Term Check-up is the transfer case fluid, especially for vehicles with four-wheel or all-wheel drive. The transfer case fluid ensures that the transfer case, which distributes power to the front and rear axles, operates smoothly. It’s crucial to check and replace the transfer case fluid according to the manufacturer’s recommendations, typically every 30,000 miles, to ensure optimal performance and prevent potential damage.
The front and rear differentials are also pivotal components that should be checked during a Long-Term Check-up. The differentials play a crucial role in distributing power to the wheels and ensuring the wheels can rotate at different speeds. Checking and replacing the differential fluid according to the manufacturer’s recommendations, typically every 30,000 to 60,000 miles, ensures they operate smoothly and prevents potential wear.
Tires are another crucial component that should be checked during a Long-Term Check-up. Ensuring the tires are in good condition, have adequate tread depth, and are inflated to the recommended pressure is crucial in maintaining optimal handling, traction, and safety. Depending on the driving conditions and tire type, tires typically need to be replaced every 25,000 to 50,000 miles.
The battery should also be checked during a Long-Term Check-up, ensuring it provides adequate power to start the vehicle and power any onboard electronics. Depending on the battery type and driving conditions, batteries typically need to be replaced every 3-5 years. Ensuring the battery is in good condition prevents potential starting issues and ensures the reliable operation of the vehicle.
Lastly, the timing belt is another component that should be checked during a Long-Term Check-up. The timing belt plays a crucial role in ensuring the engine’s valves open and close at the correct times, ensuring optimal performance and preventing potential damage. Depending on the vehicle and driving conditions, the timing belt typically needs to be replaced every 60,000 to 100,000 miles.
In essence, a Long-Term Check-up, encompassing the checking of transfer case fluid, differentials, tires, battery, and timing belt, provides a comprehensive approach to maintaining the vehicle’s performance, safety, and aesthetic. Adhering to manufacturer guidelines for these maintenance tasks ensures that the vehicle remains in peak condition, safeguarding your investment and ensuring reliable performance on the road. This routine, when adhered to diligently, ensures that the vehicle remains in peak condition, safeguarding your investment and ensuring reliable performance on the road.
Read Your Owner’s Manual
The importance of reading your vehicle’s owner’s manual cannot be overstated. This comprehensive guide, often tucked away and forgotten in the glove compartment, is a reservoir of pivotal information that is tailored to your specific vehicle, ensuring you are equipped with the knowledge to maintain its optimal performance, longevity, and safety.
The owner’s manual provides a wealth of essential information, including recommended service intervals, which guide you on when various components and fluids should be checked or replaced to ensure the vehicle remains in peak condition. Adhering to these intervals ensures that potential issues are identified and addressed promptly, safeguarding against more significant issues in the future and ensuring the vehicle remains reliable and operational.
Moreover, the manual provides guidance on correct oil and gas usage, ensuring you utilize the correct type and grade of oil and gas for your specific vehicle. Utilizing the correct oil and gas is pivotal in maintaining optimal engine performance and efficiency, preventing potential damage and ensuring the vehicle operates smoothly and reliably.
The owner’s manual also provides instructions to diagnose problems, offering troubleshooting guidance that can help you identify and potentially resolve issues without the need for professional intervention. This guidance can be pivotal in preventing potential damage and ensuring issues are addressed promptly, ensuring the vehicle remains in optimal condition.
Familiarizing oneself with the owner’s manual ensures you understand the specific needs and features of the vehicle, providing you with the knowledge to maintain its optimal performance, safety, and longevity. This practice not only safeguards your vehicle’s functionality but also contributes to safer driving experiences, as potential hazards can be mitigated before they pose a risk on the road.
In essence, the owner’s manual serves as a comprehensive guide to understanding and maintaining your vehicle, ensuring you are equipped with the knowledge to navigate through the myriad aspects of car maintenance. This practice, when adhered to diligently, ensures that the vehicle remains in peak condition, safeguarding your investment and ensuring reliable performance on the road.
Don’t ignore leaks, sounds or smells
The mantra “Don’t ignore leaks, sounds, or smells” stands as a beacon of preventative wisdom, underscoring the importance of proactive maintenance and vigilance in safeguarding your vehicle’s performance and longevity. These seemingly minor inconveniences, when left unaddressed, can metamorphose into significant issues, potentially jeopardizing the vehicle’s functionality and your safety.
Leaks, sounds, and smells emanating from your vehicle often serve as early warning signals, indicating the potential need for repairs. Ignoring these signs can not only exacerbate the underlying issues but also pave the way for costly repairs later on, as what may begin as a minor fix can evolve into a major repair if left unaddressed. For instance, a minor coolant leak, if ignored, could result in the engine overheating, leading to significant engine damage and a costly repair bill.
Examples of common leaks, sounds, and smells that should not be ignored include:
- Leaks: Oil, coolant, brake fluid, or transmission fluid leaks.
- Sounds: Squealing or grinding brakes, rattling or knocking from the engine, hissing, or sputtering exhaust.
- Smells: Burning oil, gasoline, electrical burning, or a sweet syrup-like smell which could indicate a coolant leak.
Moreover, as your vehicle ages, it’s pivotal to check the weatherstripping and seals for leaks, ensuring the interior remains dry and protected from the elements. Weatherstripping and seals play a crucial role in preventing water and debris from entering the vehicle, and ensuring they are in good condition is pivotal in maintaining the interior’s condition and preventing potential water damage.
In essence, adopting a proactive approach to vehicle maintenance, addressing leaks, sounds, and smells promptly, ensures that minor issues are addressed before they can evolve into significant problems. This practice not only safeguards the vehicle’s performance and longevity but also ensures safe and reliable operation, protecting your investment and ensuring peace of mind on your journeys.
What Are The Basic Car Maintenance Tips? – Key Takeaways
Here are the key takeaways from our basic car maintenance tips:
- Read the Owner’s Manual: Familiarize yourself with the owner’s manual to understand the specific needs, features, and recommended service intervals for your vehicle.
- Routine Checks: Engage in regular check-ups, including monthly, 3-month, 6-month, and annual check-ups, to ensure optimal performance and longevity of your vehicle.
- Address Issues Promptly: Do not ignore leaks, sounds, or smells emanating from your vehicle, as these can be early indicators of underlying issues that, if left unaddressed, could lead to costly repairs.
- Tire Maintenance: Regularly check tire pressure and tread depth, rotate tires, and replace them as needed to ensure safe and efficient driving.
- Battery Care: Perform regular battery performance checks, especially once it reaches three years of age, to ensure reliable starting and operation.
- Fluid Levels: Ensure all fluids, including oil, coolant, and windshield washer fluid, are at the appropriate levels and replace them as per the manufacturer’s recommendations.
- Lighting: Regularly check all external lights, including headlights, brake lights, and turn signals, to ensure they are operational.
- Brake System: Ensure the brake system, including brake pads and discs, is in optimal condition to safeguard against potential safety issues.
- Spark Plugs: Check and replace spark plugs as per the manufacturer’s recommendations to ensure optimal engine performance and fuel efficiency.
- Filter Maintenance: Regularly check and replace air filters to ensure optimal engine performance and efficiency.
- Wiper Blades: Ensure wiper blades are in good condition to provide clear visibility during adverse weather conditions.
- Weatherstripping and Seals: Check and replace weatherstripping and seals as needed to protect the interior from the elements.
- Be Proactive: Adopt a proactive approach to vehicle maintenance, addressing potential issues promptly to safeguard against more significant problems in the future.
These key takeaways underscore the pivotal aspects of basic car maintenance, ensuring you are equipped with the knowledge to maintain your vehicle’s optimal performance, safety, and longevity.
Leave a Comment
3 Comments
Leave a Comment
More in News

Automobili Lamborghini stars at Auto e Moto d’Epoca 2024 [Photo Gallery]

Your next Uber could be one of the world’s most luxurious electric cars

A master of air: crafting a new generation of roadster design with the Bugatti W16 Mistral [Photo Gallery]

Jaguar Classic E-type Commemorative: Jewel and Machine

Labour government has work to do to decarbonise the van and logistics industry, warns BEDEO ahead of UK Budget
Trending on Motoring Chronicle
How long does a car inspection take?

Are Le Mans Cars Faster Than F1?

Motorists are urged to shun quick-fix hacks for tree-sap removal, as ‘sticky car’ season begins
Checking Car Oil Level: A Step-by-Step Guide

[…] are some critical maintenance tips to maintain an optimal temperature in your car’s air conditioning […]
[…] batteries have varying life spans and replacement times. Factors such as battery type, usage, and maintenance affect the longevity of a car battery. Analysing these characteristics will provide insights into determining the optimal time to […]
[…] the life of a car battery. Consistent check-ups can ensure the battery remains in good condition. Key maintenance practices […]