
How to remove moisture from a car headlight
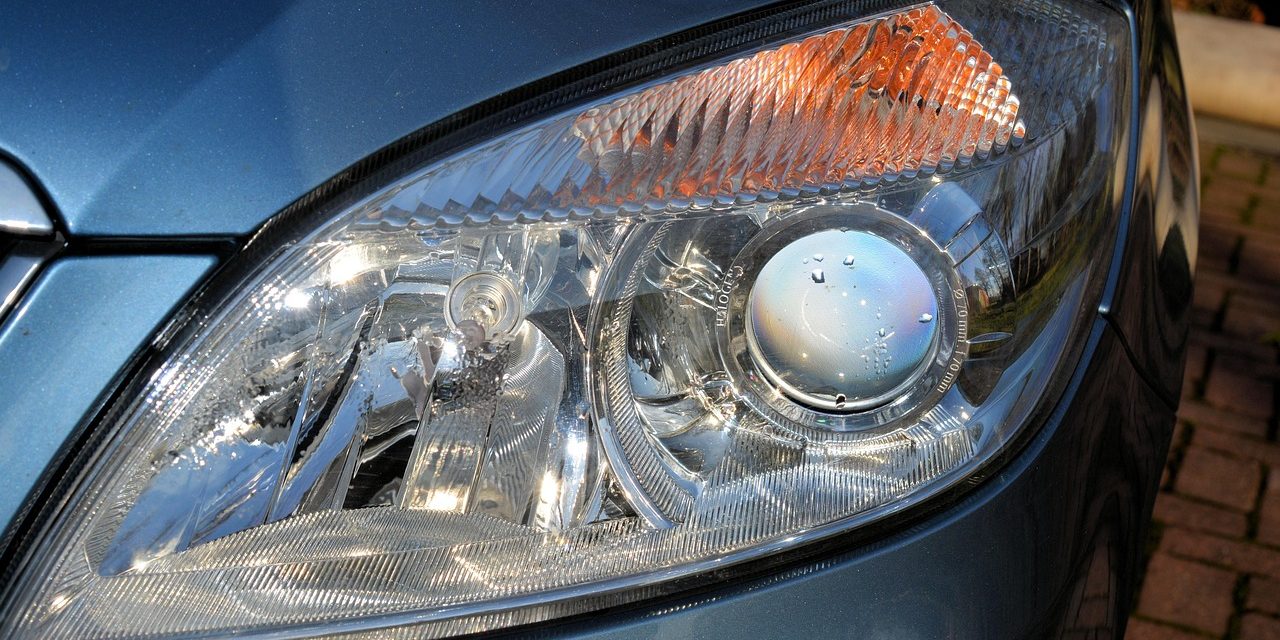
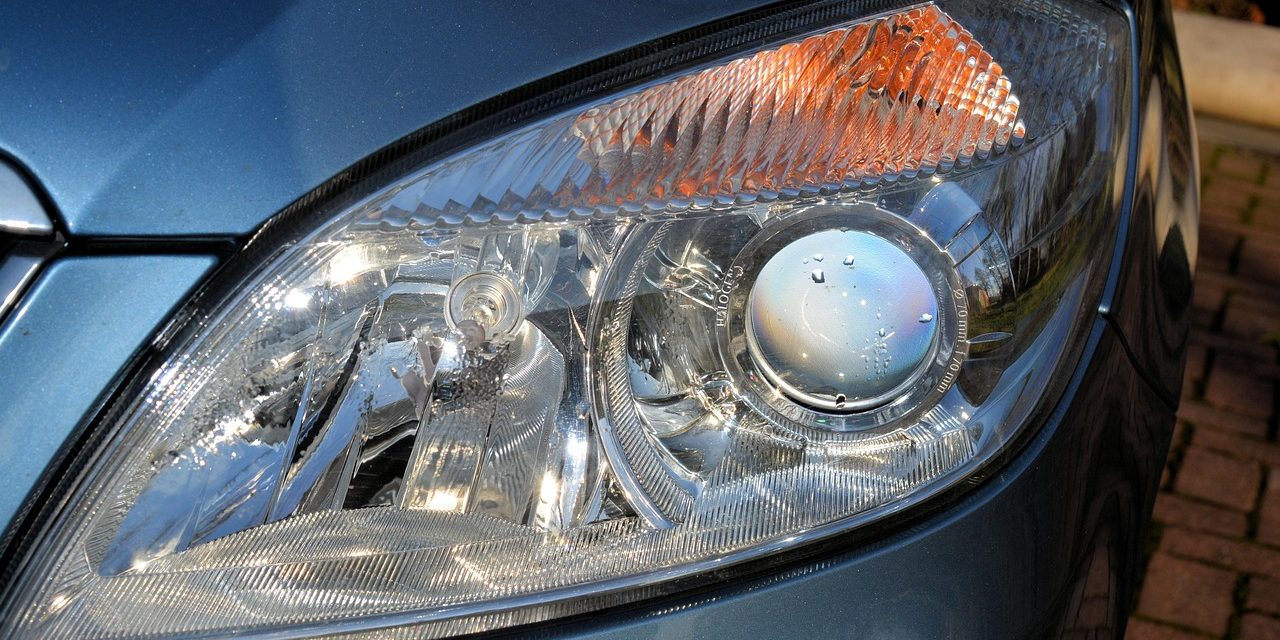
Moisture inside a headlight usually shows up as a foggy film after rain, a car wash, or a big temperature swing. The housing is meant to breathe through a vent while staying sealed against liquid water. Once that balance breaks, condensation keeps returning until the headlight is dried and the entry point is dealt with.
Here are three methods for removing moisture from a car headlight…
Method 1: Using heat and airflow
Heat and airflow remove condensation fast, and it works on most headlights that have no standing water inside.
Open the housing so air can move
Start with the engine off and the lights switched off so the housing cools. Open the bonnet, find the rear access cover, then remove the rubber dust cap and the bulb holder access cover. If the bulb is easy to remove, take it out and set it somewhere clean.
The goal is two openings. One opening lets warm dry air enter. The other opening lets damp air escape. A single opening still helps, yet drying slows down and fog returns faster.
Before adding heat, check for pooled water. If water is sloshing inside, drying takes longer and the leak is usually larger than a tired gasket.
Use gentle heat, not brute force
A hairdryer on a warm setting works better than a high heat blast. Hot air aimed at one spot can warp plastic, soften seals, or craze the lens. Hold the dryer back and keep it moving so heat spreads across the housing.
Warm air speeds evaporation. Evaporation is the job here. The goal is not to melt anything or cook the lens. If the lens feels hot to the touch, pause and let it cool, then continue.
If a heat gun is the only option, keep the heat low and the distance greater. Many housings deform easily.
Create circulation so moisture leaves, not just moves
Warm air needs a path through the housing. Tape a short cardboard funnel to the dryer nozzle if needed so air reaches the opening without touching the plastic. Feed air into one opening and let it exit through the other.
A simple way to increase airflow is a push pull setup. Blow air in with the hairdryer and pull air out with a vacuum at the second opening. That pulls damp air out of corners and speeds drying of the reflector bowl, the spot where film likes to cling.
Plan on ten to twenty minutes for light fog. Heavier condensation can take longer and can need a second round after the housing cools.
Refit carefully, then check what failed
Once the lens is clear, refit the bulb and dust cap. A loose dust cap or a pinched rubber gasket is a common trigger for repeat condensation, and it happens after bulb changes.
After refitting, check the vent path. Many headlights have a small vent tube or vent slot. If it is blocked with dirt, the housing traps moisture and fog returns even with good seals.
If condensation returns within a day or two, drying alone was never going to hold. Move to the next methods and address the leak point.
Method 2: Adding a desiccant
A desiccant absorbs leftover humidity inside the housing. It works best after the headlight is already dry.
Dry the headlight first
Do not use silica gel as a shortcut for pooled moisture. Water trapped inside overwhelms small packets and the fog returns quickly. Start with heat and airflow until the lens clears, then let the housing cool.
Cooling matters here. Warm air holds more moisture. As the headlight cools overnight, humidity can condense again. Desiccant helps most once the housing temperature stabilises.
If the lens looks clear after drying, a quick torch check can reveal haze in the corners. That haze usually returns first in cold mornings.
Place the packs so they cannot touch hot parts
Use fresh silica gel packs or moisture absorber packs intended for enclosed spaces. Insert them through the bulb opening, then place them where they cannot contact the bulb, wiring, or reflector. Heat from the bulb can damage the packet material and can leave residue inside the housing.
If placement is awkward, attach the pack to a short piece of clean wire or string and anchor it near the rear opening. Keep it away from the beam path so it does not cast shadows.
Use small packs rather than one large pack. Small packs fit better and sit safer inside most housings.
Treat it as a support, not a cure
Desiccant helps control humidity inside a housing that has a minor venting issue or a seal that is close to the end of its life. It does not fix a cracked lens, a broken rear cover, or a missing gasket.
If the headlight fogs again after rain, assume water is entering. That points back to a seal problem, a crack, or a missing cap.
Replace the packs once they saturate. Many packs change colour when full. If the packs feel damp or clumpy, they are done.
Method 3: Drilling a drain hole
A drain hole is a last resort for headlights that trap water, often after repeated condensation cycles or when a housing design pools water at the lowest point.
Dry the housing completely before drilling
Drilling into a wet housing can spread water into areas that were dry. Water can also carry plastic dust onto the reflector, which is hard to remove without opening the unit.
Dry the housing using heat and airflow until no fog remains, then let it sit with the rear cover off for a period so hidden moisture can evaporate.
Confirm the location of wiring, bulb sockets, and adjusters. The drill point must be clear of all internal parts.
Drill the smallest practical hole at the lowest point
Pick the lowest point on the plastic housing, not the lens. The housing is the thick black plastic section behind the lens. The hole should sit where water naturally pools, usually at the bottom edge closest to the bumper.
Use a small drill bit and go slow. Support the housing from behind if access allows. Plastic grabs drill bits if pressure is heavy, which can crack the housing or punch through harder than expected.
After drilling, remove the plastic swarf. Plastic dust inside the housing can stick to the reflector and reduce beam quality.
Protect the hole so it drains but does not invite dirt
A bare hole can let road spray and dust enter. The goal is drainage with minimal ingress. A short length of small tube can act as a drain spout, angled downwards so water exits and spray does not travel up.
Some owners fit a simple one way style drain grommet. The exact solution depends on the shape of the housing and access behind the bumper. The key is a clear path for water out, with the opening facing down.
If the area behind the headlight is packed tight, check that a drain spout does not rub on wiring or bodywork.
Seal the source after drilling
Draining helps symptoms. It does not stop water entering. Find the actual entry point and seal it.
Common entry points include a cracked lens corner, a failed perimeter seal between lens and housing, a torn dust cap, or a missing gasket around the bulb holder. Silicone sealant is a common fix for small cracks and failed seams on the housing, applied on the outside after the surface is cleaned and fully dry.
If the housing is cracked in multiple places or the lens seal has separated widely, replacement of the assembly is often the cleanest fix.
Key tip: fix the entry point or the fog comes back
Condensation is a sign of moisture getting in or moisture not escaping. Drying restores visibility now. A sound seal, a correctly seated rear cover, and a clear vent path keep it that way. When you address both, the headlight stays clear, the beam pattern stays sharp, and you stop revisiting the same problem every time the weather turns.
You may also like: How to Restore Your Car’s Headlights to Original Brightness: A Step-By-Step Guide
If you enjoyed this article, be sure to follow us on Microsoft Start.

Leave a Comment
More in News

How to Tell If Rust Will Fail Your MOT (and What a Repair Costs)

Why Your Car Clicks But Won’t Start (and What to Do)
Diesel Drivers Pay £31 More Per Tank Than a Year Ago, DESNZ Data Shows

Dodge Extends Durango Taillamp Warranty to Five Years, Unlimited Miles

Edinburgh Council Issued 40,945 LEZ Fines and Cancelled 2,773 After Driver Challenges
Trending on Motoring Chronicle

Councils Fined More Than 57,000 Drivers for Blocking EV Charging Bays Last Year

Lamborghini Accademia Neve 2026: performance, innovation, and lifestyle on the Livigno tracks

Automobili Lamborghini talks about industry through art: the Museum hosts “The Industrial Perspective” [Photo Gallery]
Automobili Lamborghini celebrates ten years of on-balance carbon neutrality for the Sant’Agata Bolognese production site [Photo Gallery]
