How long does it take to jump a car?


Jump-Starting a Car: Step By Step Guide
How long does it take to jump a car? While jump-starting a car is a simple process that can be done in 15-30 minutes, to avoid potential injury, follow these detailed steps to ensure proper jump-starting methodology.
- Prepare Materials: Gather the necessary equipment required for jump-starting your vehicle – typically, you need jumper cables and another functioning vehicle.
- Position Vehicles: Place both cars in safe positions with their hoods facing each other, but without touching.
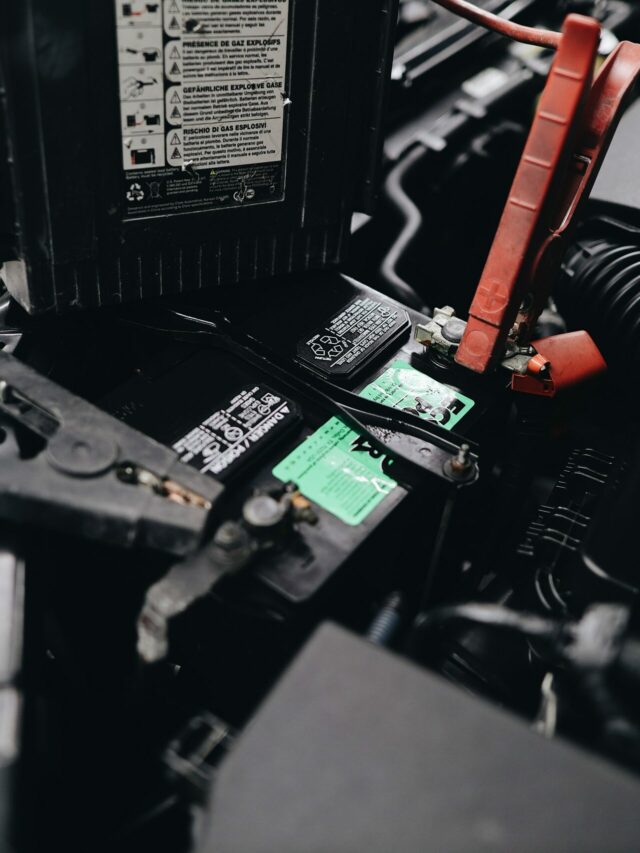
- Connect the Jumper Cables: Connect the red (positive) clamp of one end of the jumper cable to the positive terminal of your dead battery, and connect the other end to the positive terminal of the functional battery. Then, connect one black (negative) clamp to the negative terminal of your working battery, and securely ground the other end to an unpainted metal surface on your disabled vehicle.
- Start Your Vehicle: Now turn on your ignition while someone revs up their engine so as to charge up your dead battery.
- Disconnect Jumper Cables: Safely detach each clamp from their terminals.
Before beginning this procedure, it is important to remove any jewelry or metal objects from around your neck or wrists for safety reasons.
Fun Fact: According to AAA’s data analysis team, dead batteries are responsible for more than 50% of annual calls received by their service teams in winter months alone!
Preparation Before Jump-Starting
To prepare before jump-starting your car with the necessary tools, follow the three sub-sections below: Checking the Battery, Positioning the Cars, and Gathering Necessary Equipment. Each will help ensure a successful jump start and extend the lifespan of your battery.
Checking the Battery
To ensure the optimal functioning of your vehicle’s power source, it is vital to conduct a thorough examination of the energy storage unit. An efficient and safe way of analyzing your car battery before commencing jump-starting procedures can save both time and effort.
To check the readiness of your automobile’s energy source, follow these five simple yet effective steps:
- Inspect the battery terminals for any signs of corrosion or rust
- Ensure that the terminals are tightly secured
- Use a voltmeter to measure the battery voltage levels
- Analyze if it reaches 12.6 volts or higher; otherwise, recharge before jumping
- Check the battery’s health by performing a load test using proper equipment
Another important aspect to consider when testing your car’s power cell is to ensure that you do not touch any of the terminal connections while conducting checks on them. Furthermore, always wear protective gear like gloves and eyewear since sulfuric acid can pose serious risks if exposed to skin or eyes.
Pro Tip: To extend your power cell’s lifespan, always switch off all lights and audio devices before turning off your vehicle. This will reduce the load on your battery and promote a longer service life.
Move over, NASCAR. Positioning the cars before jump-starting requires more precision than a pit crew changing tires in under 10 seconds.
Positioning the Cars
Proper Car Positioning is Crucial Before Jump-Starting
Positioning the cars before jump-starting is crucial to ensure safety and effective jump-starting. To begin, pull both cars close to each other, but never touching. Turn off the engine and put both vehicles in neutral gear.
Next, make sure that both vehicles are parallel and facing each other. Verify that their battery terminals are free from any corrosion or dirt build-up, which may affect their performance during the jump-start.
It’s also essential to position the vehicle with the good battery next to the car that requires a jump-start. This way, you can easily connect the jumper cables from one battery to another without twisting them around unnecessarily.
Ensure that there is no contact between any metal parts of both cars when connecting jumper cables as it can cause sparks, leading to an explosion hazard.
Gathering Necessary Equipment
When preparing to jump-start a car, it is essential to make sure you have all the necessary equipment on hand. This can be achieved by gathering all the required tools that are involved in the process of jump-starting a vehicle.
- One should have jumper cables with heavy-duty clamps to make secure connections and transfer power between batteries.
- A flat, stable surface for positioning vehicles so they remain stationary during the process, ensuring safety.
- It’s crucial to check your car’s manual for specific instructions before jump-starting because there might be unique requirements such as turning off all electrical systems.
In addition to the above points, it is also advisable always to check the battery voltage level before attempting to start it. Make sure that both cars are in park or neutral if it’s an automatic one and do not switch on any of their headlights or radios.
Connecting the Jumper Cables
To successfully connect the jumper cables while jumpstarting a car, you need to be aware of the positive and negative terminals in the car’s battery. This will help you avoid any mishap and jumpstart the car correctly.
In this section ‘Connecting the Jumper Cables with Identifying the Positive and Negative Terminals, Connecting the Jumper Cables in Correct Order’, you will learn the correct method to connect the cables to jumpstart your car.
Identifying the Positive and Negative Terminals
Identifying the Polarity of Jumper Cable Terminals
Jumper cables are essential components to get a dormant or failed car battery charged quickly. A vital step in this process is identifying the polarity of the jumper cable terminals correctly.
Follow these steps:
- Locate the battery terminals on each vehicle.
- Check both batteries’ details about their power and voltage.
- Look for thin, red, or orange markings near the positive terminal.
- A negative terminal usually has black coloring beside it.
- Ensure that you never mix up these cables during attachment; doing so can damage your car’s electrical system irreparably.
- Always keep a reliable user manual for your vehicles as they map out where things are!
It’s important to note that misidentifying the positive and negative terminals can cause severe harm to your electric system.
Recommendations would be:
- Use distinctive-colored electrical tape to mark your jumper cables’ ends, creating a visual aid in connecting them promptly without causing any mistakes.
- Purchasing an anti-sparking tool can also be handy.
By following these simple steps, you can ensure ultimately that you connect the jumper cables safely and appropriately without any potential risks or damage.
Connecting the Jumper Cables in Correct Order
When jump-starting your vehicle, it’s crucial to connect the jumper cables in the right order. This ensures safe and effective power transfer without risking any damage to the vehicle’s electrical system. Here’s a step-by-step guide for connecting the jumper cables correctly:
- Park the vehicles side by side, turn off both engines, and engage the parking brakes.
- Identify the positive and negative terminals on both batteries. The positive terminal (+) is usually marked as red, while the negative (-) is marked black.
- Connect one end of the red jumper cable (positive) to the positive terminal of the dead battery.
- Connect the other end of the same cable to the positive terminal of the good battery.
- Next, connect one end of the black jumper cable (negative) to the negative terminal of the good battery.
- Finally, connect the other end of that same cable to an unpainted metal surface on your car away from its battery.
It’s essential to ensure that all connections are tight before attempting to start your vehicle.
Remember never to touch metal parts or allow them to touch each other while making these connections. Once you’ve successfully started your car, let it run for several minutes before disconnecting any cables.
While jump-starting your vehicle can be nerve-wracking, following these steps can help ensure a safe and successful jump-start experience without causing further damage or aggravation.
Next time you find yourself with a dead battery, keep this guide handy for a hassle-free jumpstart experience.
Jumpstarting a car has been an essential skill that every driver must have since automobiles became widely used in society in 1910. However, with advancements in technology and more complex electrical systems now prevalent in modern cars, it has become more important than ever before that jumper cables are connected correctly for safety reasons.
Starting the Dead Battery
To start your dead battery with the tips provided in ‘Starting the Dead Battery’ section, use ‘Start the Working Car’, ‘Let the Car Run for Several Minutes’, and ‘Start the Dead Car’ as a solution. These sub-sections will help you jump your car and get back on the road in no time.
Start the Working Car
Starting the Dead Battery of a Car – A Professional Guide
To start a dead battery, you need to begin with starting the working car. Here are the four steps to follow in doing so:
- Park both cars close enough together, but ensure that they do not touch each other.
- Connect the red positive cable (jump lead) clamp to the dead car battery’s positive (+) terminal.
- Connect the other end of the red positive cable (jump lead) clamp to the working car’s positive (+) terminal.
- Attach one black negative cable (jump lead) clamp to the working car’s negative (-) battery terminal and attach its end on an unpainted metal surface of your dead vehicle. This will prevent sparking.
Apart from these basic steps, remember that motor vehicles have different specifications. Hence, it is recommended that you follow your vehicle’s manufacturer manual for further guidance.
Additionally, avoid smoking around both batteries and any spark or flame sources like welding machines or jump starters.
Before leaving your vehicle, remove your keys from the ignition lock and take off jewelry pieces that might be stuck in any part of either engine.
If still having trouble after trying this method, contact a professional mechanic for further assistance.
Following these suggestions ensures safety measures are taken while facilitating starting up your dead battery with ease.
Let the Car Run for Several Minutes
Starting a car with a dead battery is a common issue that can be solved by running the engine for some time. Running the vehicle will let the alternator charge the flat battery and provide enough power to start the car.
After inserting jumper cables, turn on the working car’s engine and let it run for a couple of minutes before starting your vehicle. Keep both cars connected via cables during this time. The running car will transfer its charge to your battery through these cables and slowly build up enough juice to operate your vehicle.
While revving up, allow all accessories inside your wheels to switch off. This technique helps reduce energy consumption, allowing more power to move towards initiating the other automobile’s dead battery. Additionally, avoid turning off either vehicle while this process takes place.
Finally, disconnect each clamp in reverse order of attachment once you have started and driven for a while (like 10-15 mins). Then keep driving around so that act of charging continues for some more time. Additionally, switching off unnecessary electrical devices like heater or headlights could potentially save electricity.
Start the Dead Car
Dealing with a dead car battery is a common issue that every driver has to face at some point. When you’re stuck, one of the most valuable things you can have in your trunk is a set of jumper cables, but it’s vital to know how to start the dead car. Here’s what you need to know:
- Park the functional car next to the dead one.
- Connect positive jumper cable to the positive terminal on both batteries.
- Attach negative jumper cable to the negative terminal on both batteries.
- Start the working car and wait for 2-3 minutes.
- Start the dead car and remove cables from cars’ terminals in reverse order of attachment.
- Drive your revived vehicle around for several minutes after jump-starting.
It’s crucial not to forget any step during this process, otherwise, you might damage either battery or electrical system. Keep children or pets away from all vehicles, as accidents can occur.
If there are any sparking noises during the linking process, immediately stop and consult an expert auto technician.
Always carry a portable jump-starter device in your emergency kit, additionally, check battery levels every three months and replace them once they pass their lifespan.
A mechanic once told me a story about someone who left their lights on all night and had to call roadside assistance for help in starting their dead battery—right before their important job interview! Remember, prevention is better than cure!
Disconnecting the Jumper Cables
To disconnect the jumper cables properly and avoid any damage, follow these simple steps. Start by disconnecting the jumper cables in reverse order, and then let the dead car run for a while. This will ensure that the battery has enough time to replenish and that it is not damaged during the process.
Disconnect the Jumper Cables in Reverse Order
Disconnecting the Jumper Cables in Reverse Order is an essential step towards safe disconnection of the cables. Following this order ensures that the flow of current is interrupted gradually, and damage to the electrical components is avoided.
Here’s a 6-Step Guide to Disconnecting the Jumper Cables in Reverse Order:
- Shut off both engines and remove any metal jewelry or accessories.
- Remove the negative cable from the engine block or battery of the previously dead vehicle
- Remove the negative cable from the engine block or battery of the booster (charged) vehicle
- Remove the positive cable from charged Booster vehicle battery.
- Lastly, remove positive cable from previously dead vehicle’s battery.
It’s important to inspect both batteries and their terminals for corrosion before jumpstarting. Ensure that both batteries are compatible with each other before proceeding.
To prevent damage to your battery life, it’s recommended not to let your vehicle idle after jumpstarting. Instead, either take it for a drive or let it run on while you’re checking systems like lights, brakes, etc.
Let the Dead Car Run for a While
Allow the engine of the inactive vehicle to run for a brief period before disconnecting the cables. This allows for a charge to flow through and can improve battery life. Be cautious while disconnecting jumper cables, taking note not to allow them to touch each other or any metal parts.
It is best recommended to start with the black/negative cable first and remove it from the dead battery’s negative terminal before removing it from the functioning vehicle’s negative terminal. It is vital that you do not remove both terminals at once as it can cause an electrical shock.
Remember, when handling jumper cables, ensure they are not touching the ground or touching parts of either car that aren’t battery terminals.
A faulty alternator can cause unpredictable results when attempting to charge your car battery using jumper cables. According to “Consumer Reports”, improper use of jumper cables poses several safety issues and must only be handled by trained mechanics.
How long does it take to jump a car? – Key Takeaways
The time required to jump a car is not standard, and different factors determine it. Considering the type of battery, the level of charge on both batteries, the quality of jumper cables, and the method used can impact the duration. To be specific, it can take between five and thirty minutes.
The process of jumping a car involves connecting jumper cables to both cars’ batteries. Once connected appropriately, start the working car’s engine, wait for some minutes and then try starting the dead battery vehicle. If it starts without any hiccups, remove the cables carefully within the reverse order. Low temperatures can increase the time taken to jump start as they reduce battery capacity.
It’s worth knowing that while jump-starting a car is an essential skill to have in emergencies, prevention is better than cure. Regularly maintaining your vehicle by keeping its parts healthy lowers instances that may require a jumpstart. A case in point is disconnecting all electrical equipment when leaving for long periods or changing a battery often after reaching its lifespan.
It’s said that the first successful jumper cables were made in 1918 by C.L.Parnia & Company (later known as Booster Cable Inc) following increasing cases of people needing battery jumps due to failed starting techniques or lack of equipment needed at that time.
How long does it take to jump a car? – Frequently Asked Questions
How Long Does it Take to Jump a Car?
Can Jump-Starting a Car Cause Damage to the Electrical System?
What Equipment Do I Need to Jump-Start a Car?
Is it Safe to Jump-Start a Car in the Rain?
Can a Dead Battery be Recharged?
How Can I Avoid Needing to Jump-Start My Car?


Leave a Comment
More in News

Mercedes-AMG strategically reorganises its GT Sport division

New design language: Enhanced CUPRA Formentor and CUPRA Leon now available to order in the UK

The end of the Car-Gument: The New Renault Scenic is such a perfect family car that buyers are promised relationship bliss – or their money back!

Car production down in first half as manufacturers invest in electric future

Small car, big milestone: 20 years of the Kia Picanto [Photo Gallery]
Trending on Motoring Chronicle
How To Start A Car

Why an Audi drives like an Audi
How To Start A Car With A Bad Starter With A Screwdriver

5 Best Cars for College Students