How to Remove Auto Window Tint
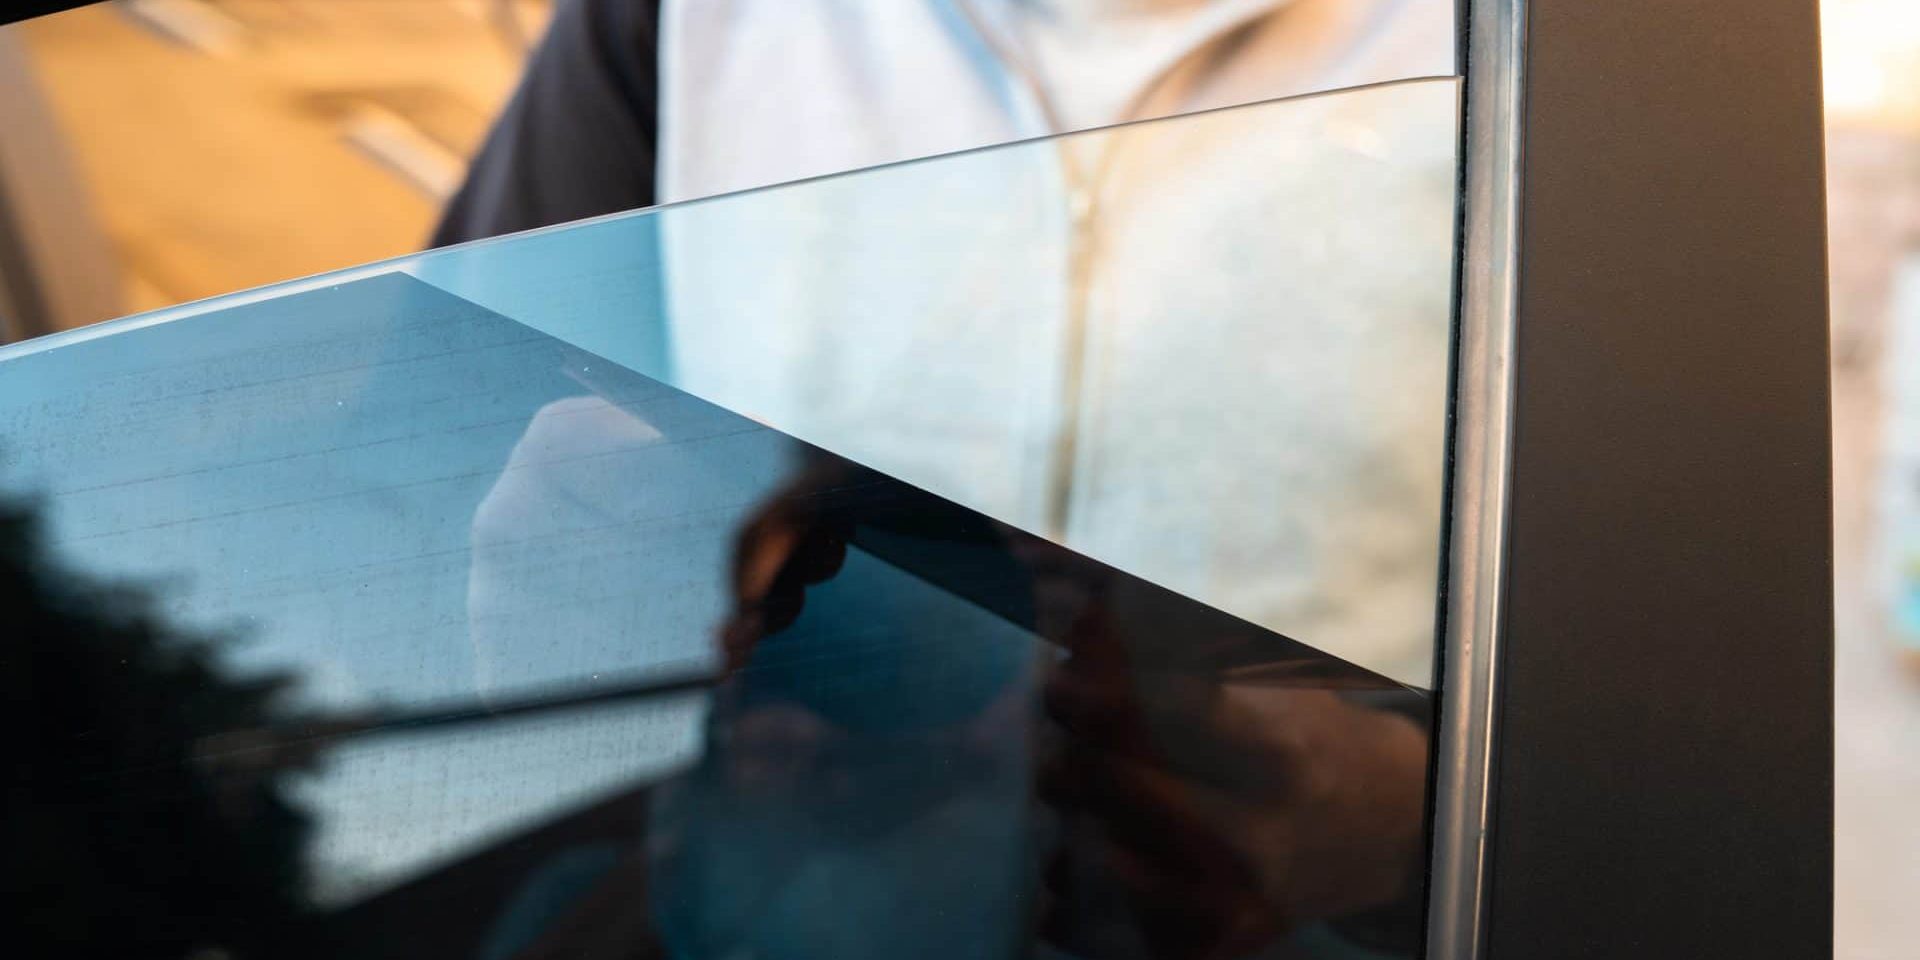

The safest and most effective way to remove window tint from a car is to soften the adhesive with heat and peel the film off in full sheets. A handheld fabric steamer is the best tool for the job. It applies even, moist heat that loosens the glue without risking damage to the glass or the rear defroster lines. A heat gun works faster but requires more care to avoid cracking the glass. An ammonia and sunlight method works without any heat tools at all but takes longer and produces strong fumes. All three methods cost under $75 (£60) in materials and take two to four hours for a full vehicle. Professional removal runs $220 to $350 (£175 to £280).
Why Window Tint Needs Removing
Window tint does not last forever. Most dyed and hybrid films degrade after eight to twelve years of UV exposure. The first visible sign is usually bubbling, where the adhesive separates from the glass and trapped air pockets form under the film. Once bubbling starts, it spreads. Purple discoloration follows on dyed films as the dye breaks down under sustained sun exposure. Bubbled or discolored tint looks neglected, reduces outward visibility, and in many jurisdictions makes the vehicle fail its MOT (in the UK) or state safety inspection (in the US) if the front side windows fall below the legal light transmission threshold.
Tint also needs removing when a previous owner applied a shade that is darker than legal limits. In England and Wales, the front windscreen must allow at least 75 percent of light through, and the front side windows must allow at least 70 percent. In the US, tint laws vary by state, but every state restricts how dark the front side windows can be. Removing non-compliant tint and replacing it with a legal shade is easier than dealing with repeated fines or a failed inspection.
Method 1: Fabric Steamer (Recommended)
A standard handheld fabric steamer, the kind used for removing wrinkles from clothing, is the best tool for DIY tint removal. The steam delivers consistent, even heat with moisture that helps break down the water-based adhesive layer without generating the concentrated hot spots that a heat gun can produce.
Start by filling the steamer and letting it reach full temperature. Hold the nozzle one to two inches from the inside surface of the window and move it in slow vertical passes across the entire pane. After 30 to 60 seconds of steaming, the adhesive begins to soften. Use a razor blade or a plastic scraper to lift one corner of the film, then pull the film slowly and steadily at a 45-degree angle while continuing to steam the area just ahead of the peel line. On a well-heated window, the film will come away in one full sheet with minimal residue left on the glass.
The steamer method is the safest option for rear windows that have embedded defroster lines. The low, even temperature does not create the sudden thermal stress that cracks glass or damages the thin metallic defroster grid. Move the steamer slowly and avoid concentrating steam on a single point for more than a few seconds.
Method 2: Heat Gun
A heat gun is faster than a steamer but requires more attention. Set the heat gun to its lowest effective setting, typically around 200 to 300°F (93 to 149°C). Hold it four to six inches from the glass and keep it moving at all times. Parking the heat gun in one spot will create a thermal hotspot that can crack the window, especially in cold weather when the outside surface of the glass is cool and the inside surface is being heated rapidly.
Work in sections. Heat an area roughly the size of a dinner plate, lift a corner with a razor blade, and peel slowly. If the film tears or resists, apply more heat to the area immediately ahead of the tear before pulling again. The heat gun method produces slightly more adhesive residue than the steamer method, which means the cleanup stage takes longer. On side windows, the risk of glass damage is low as long as the temperature stays below 300°F. On the rear window, extra caution is needed around the defroster lines.
Method 3: Ammonia and Sunlight
This method uses household ammonia and solar heat to break down the adhesive without any electrical tools. It works best in warm weather with direct sun exposure and is not practical in winter or overcast conditions.
Cover the outside of the window with a black plastic trash bag, cut to fit, and hold it in place with soapy water sprayed onto the glass. The black plastic absorbs solar heat and raises the temperature of the glass. On the inside of the window, spray a generous layer of household ammonia (the standard cleaning-strength solution from any grocery store) directly onto the tint film. Immediately cover the inside surface with a second black plastic bag, trapping the ammonia fumes against the film. Park the car in direct sunlight and wait 60 to 90 minutes.
The combination of heat from the sun and the chemical action of the ammonia softens the adhesive. After the waiting period, peel the inside bag off and lift the tint film from one corner. It should come away with moderate effort. This method produces strong fumes. Work with the doors open or in a well-ventilated area, wear rubber gloves, and keep ammonia away from leather and fabric upholstery. Ammonia can discolor or dry out leather surfaces on contact.
How to Remove the Adhesive Residue
Regardless of which method is used to peel the film, some adhesive residue will remain on the glass. Leaving it in place creates a hazy, sticky surface that collects dust and smears when the window is cleaned. Removing the residue is the second half of the job and often takes as long as removing the film itself.
Soapy Water and a Razor Blade
For light residue, spray the glass generously with a solution of warm water and a few drops of dish soap. Let it soak for two to three minutes, then scrape the residue off with a new, sharp razor blade held at a shallow angle to the glass. The soap lubricates the surface and prevents the blade from scratching. Wipe the glass clean with a microfiber cloth between passes. This approach works well on side windows where the residue layer is thin and even.
Rubbing Alcohol or Adhesive Remover
For heavier residue, especially on rear windows where the adhesive tends to be thicker, apply rubbing alcohol (isopropyl alcohol) or a commercial adhesive remover like Goo Gone directly to the residue. Let it sit for five minutes, then scrape with a plastic razor blade or a credit card edge. Rubbing alcohol evaporates cleanly and does not leave a film. Commercial adhesive removers work faster on stubborn patches but can leave an oily residue that needs a second pass with glass cleaner.
Rear Defroster Lines: Handle with Care
The rear window defroster grid is made up of thin metallic traces printed or bonded onto the glass surface. These lines are fragile. A metal razor blade dragged across them will sever the circuit, disabling one or more heating elements. When cleaning residue from the rear window, use only a plastic scraper, work in the same direction as the lines (horizontally), and apply minimal downward pressure. If defroster lines are accidentally damaged, conductive paint repair kits are available, but the repair is fiddly and not always reliable. Prevention is easier than the fix. Keeping your glass cleaning technique gentle around the rear window protects both the defroster grid and the tint adhesive layer on any replacement film.
DIY Tint Removal vs. Professional Removal
The materials for DIY removal cost between $10 and $75 (£8 to £60) depending on whether you already own a steamer or heat gun. A fabric steamer suitable for the job costs around $25 to $40 (£20 to £32). Razor blades, adhesive remover, and microfiber cloths add another $10 to $15 (£8 to £12). The job takes two to four hours for a full car, with most of that time spent on the rear window and adhesive cleanup.
Professional tint removal at a window tint shop or auto detailer typically costs $220 to $350 (£175 to £280) for a full vehicle, or $50 to $75 (£40 to £60) per window. The professional has commercial-grade steamers, experience working around defroster lines, and the ability to retint the same day. For a single window or a straightforward film in good condition, DIY is cost-effective. For a car with badly degraded, bubbled tint that has baked onto the glass for 15 years, paying a professional saves time and reduces the risk of damaging the defroster grid.
Applying New Tint After Removal
If the reason for removing the old tint is to replace it with new film, the quality of the surface preparation determines how well the new tint adheres. Every trace of old adhesive must be removed from the glass. Even a thin, invisible residue layer will prevent the new film from bonding properly and cause premature bubbling.
After removing all residue, clean each window with a mixture of distilled water and a small amount of baby shampoo (the standard solution used by professional tint installers), then wipe dry with a lint-free cloth. Do not use ammonia-based glass cleaners on freshly cleaned surfaces that will receive new tint, as ammonia can interfere with the adhesive on the new film. Any paint and surface care products that contain silicone or wax should also be kept away from the glass, as silicone residue creates adhesion failures in the new film.
How to Fix Bubbled Window Tint Without Removing It
Small, isolated bubbles on otherwise intact tint can sometimes be repaired without removing the entire sheet. Use a pin or the tip of a razor blade to prick a tiny hole in the center of the bubble, then press the film flat with a credit card or squeegee, working the trapped air out through the hole. Spray a small amount of soapy water on the surface before pressing to lubricate the squeegee and prevent scratching the film.
This fix works on new tint where the bubble is caused by a small installation defect. It does not work on old, degraded tint where the adhesive has failed across a wide area. If bubbles are spreading, the adhesive has broken down and the film needs full replacement. Patching individual bubbles on dying film is a temporary cosmetic fix that delays the inevitable removal by weeks, not years.
Removing Decals and Stickers from Car Windows
The same techniques that remove window tint work on registration stickers, parking permits, dealer decals, and any adhesive-backed sticker on automotive glass. A few seconds of heat from a steamer or heat gun softens the adhesive, and the sticker peels off cleanly. For small stickers, a hair dryer on its highest setting provides enough heat. Follow up with rubbing alcohol on a cloth to remove the adhesive footprint. On painted body panels rather than glass, the approach changes. Heat and solvents that are safe on glass can damage clear coat and paint if applied too aggressively, so use lower heat and test any solvent on a hidden area first.
Window Tint Frequently Asked Questions
What is the easiest way to remove window tint?
A handheld fabric steamer is the easiest and safest method. It softens the adhesive evenly, allows the film to peel off in full sheets, and produces less residue than other methods. The steamer also poses the lowest risk to the rear defroster lines. The entire job, including adhesive cleanup, takes two to four hours for a full vehicle.
Can you remove window tint with a hair dryer?
A hair dryer can work on small areas like a single side window or a sticker, but it does not generate enough sustained heat to soften the adhesive efficiently across a full window. The job takes significantly longer than with a steamer or heat gun, and the film is more likely to tear into small pieces rather than peeling in full sheets. A hair dryer is a reasonable tool for a single parking sticker but not practical for a full car.
Will removing tint damage the rear defroster?
It can if done carelessly. Metal razor blades dragged across the defroster lines will cut through the thin metallic traces and disable the heating element in that section. Use a plastic scraper on the rear window, work horizontally in the same direction as the lines, and apply minimal pressure. The steamer method is the safest for rear windows as it produces the least residue and requires the least aggressive scraping.
How much does it cost to have tint professionally removed?
Professional tint removal typically costs $220 to $350 (£175 to £280) for a full vehicle, or $50 to $75 (£40 to £60) per individual window. Prices vary by region, the condition of the existing tint, and whether the shop includes retinting in the service. Badly degraded tint that has baked onto the glass for many years costs more to remove than relatively fresh film.
Does WD-40 remove window tint adhesive?
WD-40 can soften window tint adhesive, but it leaves an oily film on the glass that requires thorough cleaning with a degreaser or glass cleaner afterwards. Rubbing alcohol or a purpose-made adhesive remover like Goo Gone is more effective and easier to clean up. If WD-40 is all that is available, it will work in a pinch, but expect an extra round of cleaning

Leave a Comment
More in News
English Councils Banked a Record £1.1 Billion From Every Driver’s Parking Fines Last Year
How DVLA Promises 99% of Licences in Three Days After Admitting Services Fall Short
What to Do in a Motorway Breakdown (and When to Stay Inside)

How to Jump Start a Car Safely (and What a New Battery Costs)

Every Driver Gets Five Minutes Grace as Government Freezes Parking Charges at £100
Trending on Motoring Chronicle

Garage Complaints to the Motor Ombudsman Jumped 22 Percent as Payouts Hit £4,308
Every Insured Driver in Britain Pays Extra for the 300,000 Uninsured Cars on the Road Each Day

Lamborghini Miura: Born Incomparable
Is the Lamborghini Veneno a V12?